
Setting the Gold Standard
DoxAI was named a GSI Gold Standard In AI 2025 winner by SoftwareVerdict® for our AI solutions; recognised for real-world impact, reliability and governance.
Read the reportSecure and Scalable Document Automation with Data Exchange
Secure
Quantum grade encryption at rest and in transit with regular key rotation and storage geo-replication.

Scalable
Designed on an auto-scalable micro-service architecture that enables the solution to be flexible for your business needs.
Plug n Play
Agnostic to the medium, easy to integrate into existing workflows or legacy systems via iFrame or API in less than a week.
How it works

Streamline Requests
Use our pre-built document templates or customise your own information templates to request the right files or data from your client. Then, simply enter their details, and you’re ready to go.
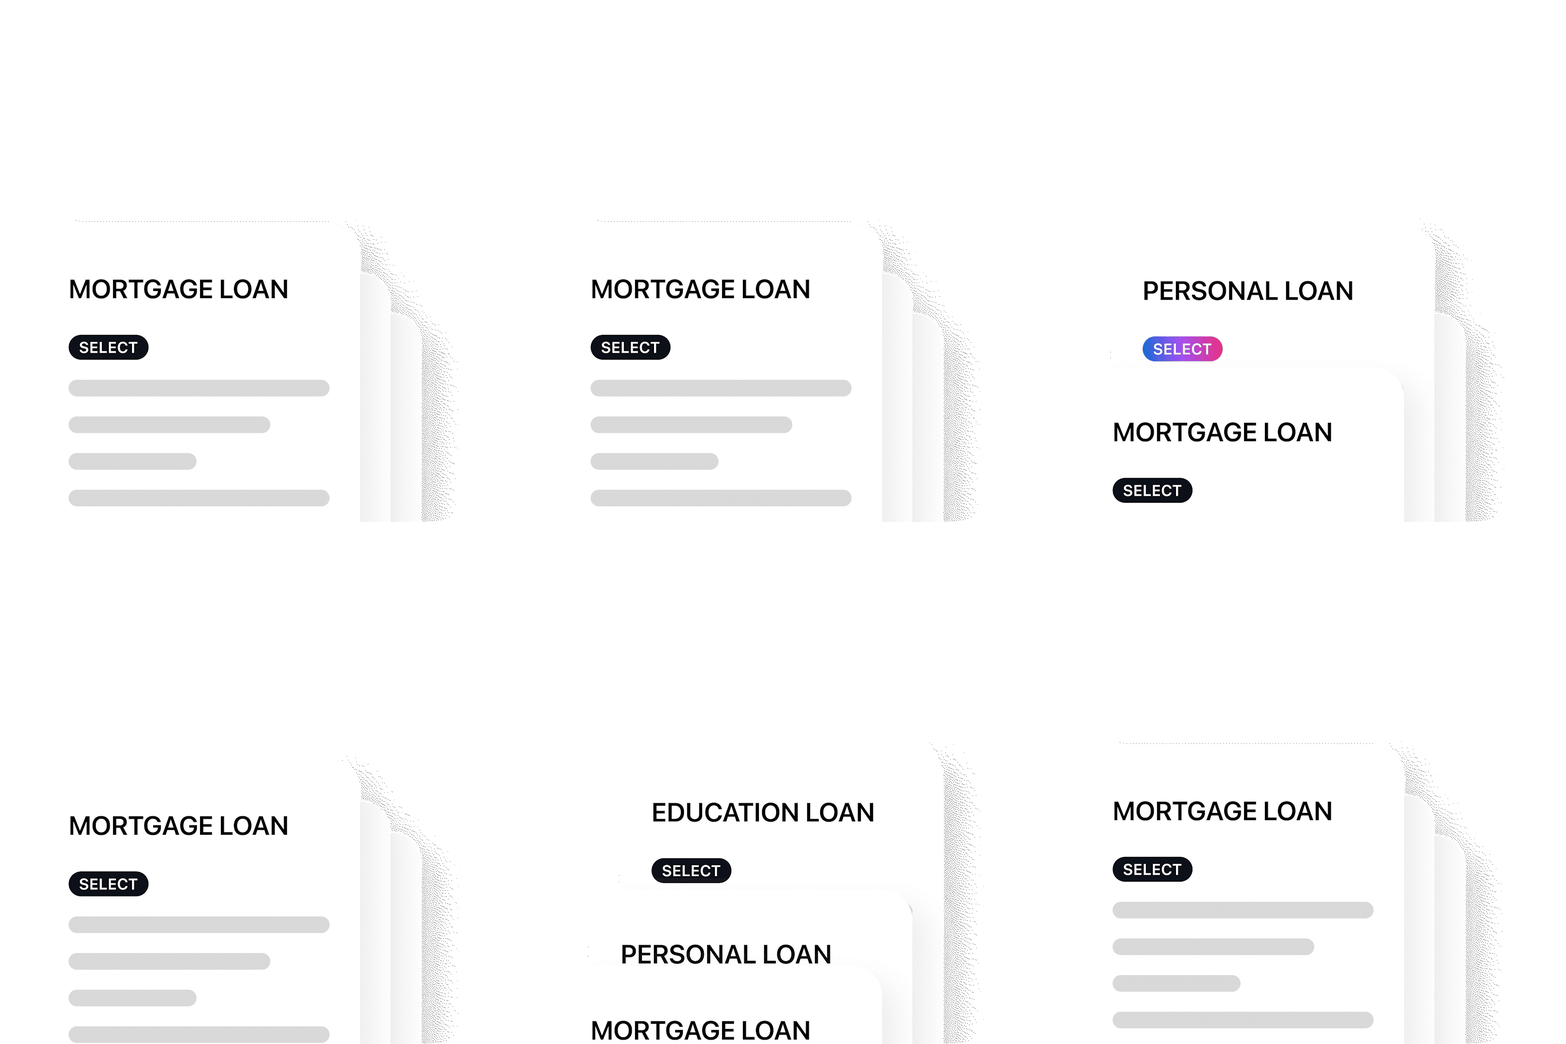

Automatically Notify Clients to Upload their documents
Your client gets an email and SMS with a portal link to upload their documents and data. Automatic reminders ensure they stay on track.


Effortless Document Approval and Management
From Approving or rejecting documents with a click. Once done, complete the request, save it for later, export, or purge. Total control, your way.

Custom Reminders & Notifications
Say No to Document Chase
Increase communication speed with customised reminders and notifications, reducing document collection time and boosting efficiency.


Streamline Data Collection with Custom Workflows
No More Digging through
Files or Juggling Platforms
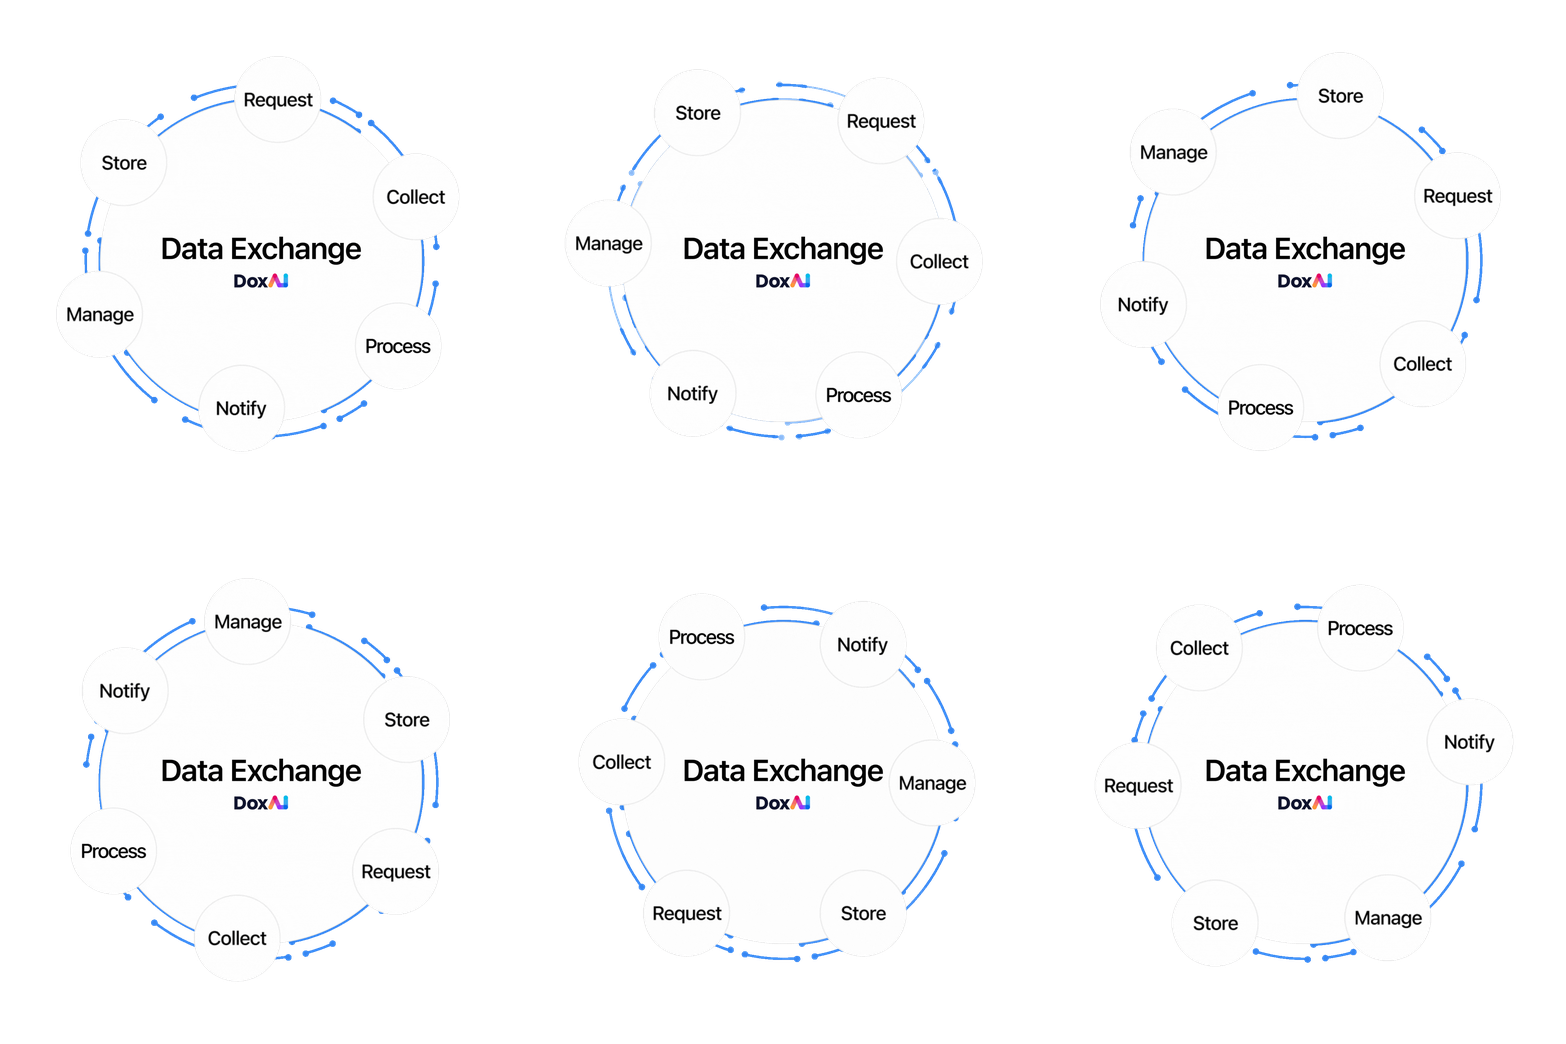
Collect, manage, process and store all your client data in one secure, automated hub with customised workflows. Design, automate, and optimise tasks according to your business needs.

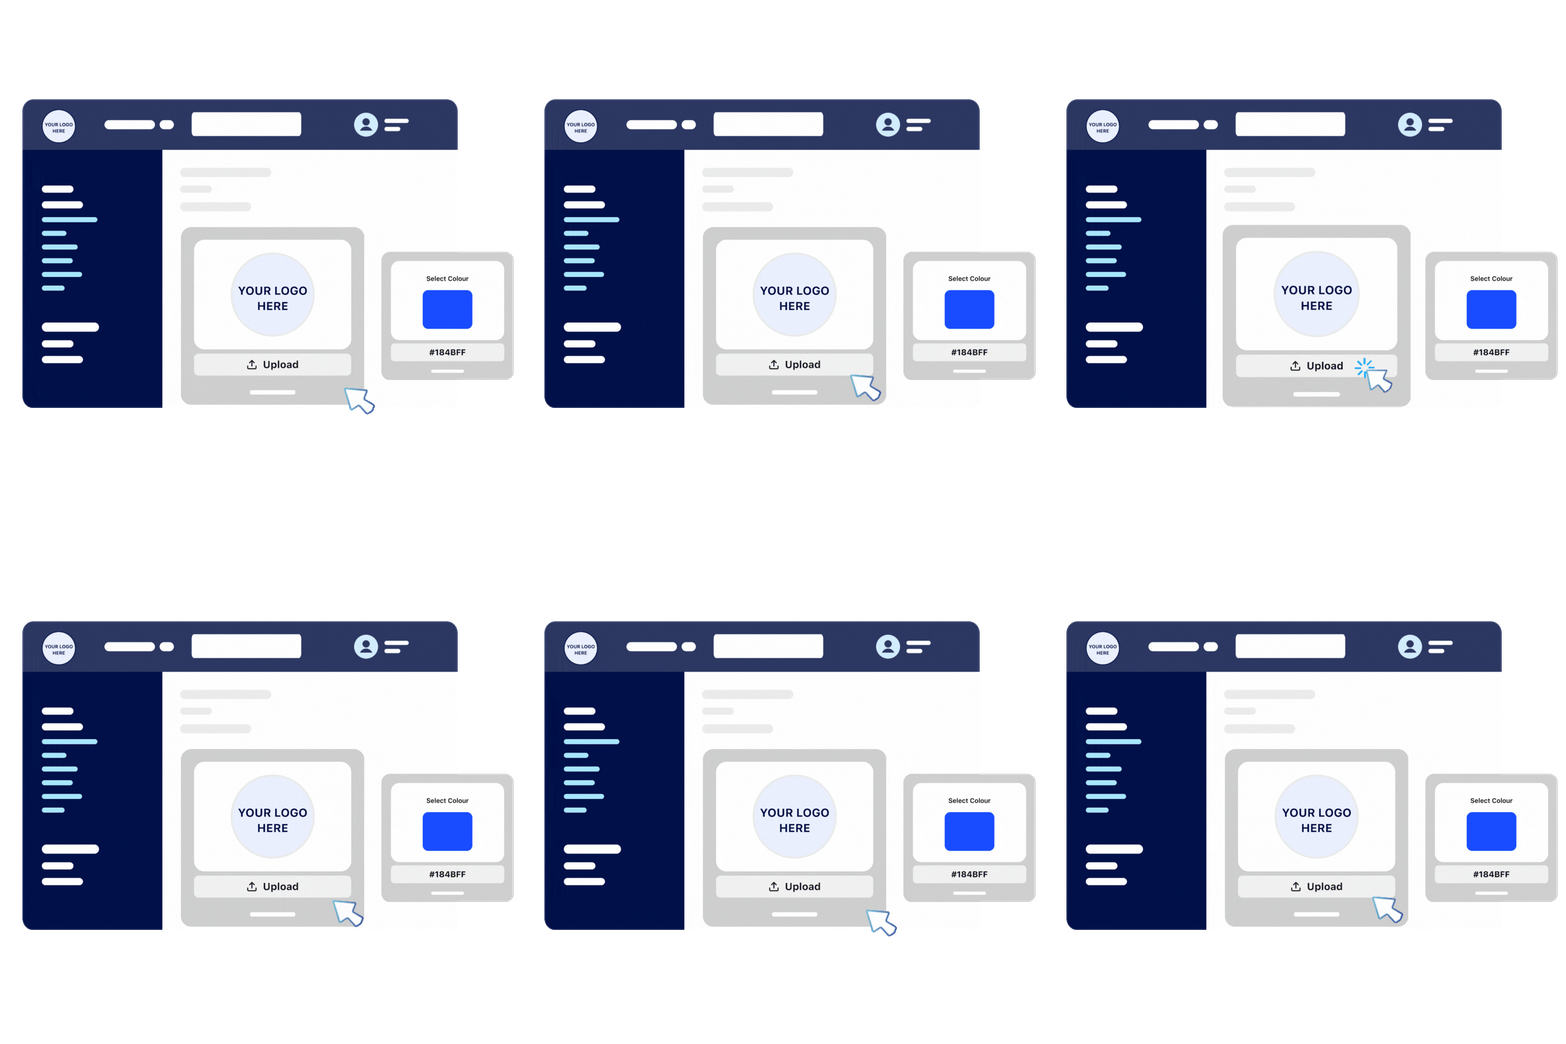
White labeled Solution
Enhance Branding &
Customer Experience
Every business seeks a unique solution. With our platform, white labelling and customisation are seamless, enabling you to deliver a personalised experience that truly connects with your customers.

Eliminating Fraud
Say Goodbye to Unsafe
Email Communication
Minimise scams and fraud by avoiding email-based sharing of sensitive information to enhance security with jurisdiction-aligned data exchange.


Key Functionalities
iVerify
VOI user experience, guiding customers through the process of uploading ID documents and completing biometric checks.
eSign Capabilities
Get your requested documents eSigned on the go efficiently with DoxAI Sign out of the box integration.

Auto Redact AI
Redaction service enabled automatically for uploads with more than 40+ templates and custom template options.
eForm Capture
Streamline the collection of data and insights from your customers via our eForm capabilities.
Extract AI
Automatically extract information from any data or document with our AI extraction.

Custom Templates
Ability to customise your document and data collection request based on your business needs.
Audit Logs
Detailed audit trails/logs for actions performed by users for compliance requirements.
File Conversion
Transform information and documents in different formats that work for your system requirements.
eVault
Store all collected documents in eVault with quantum grade encryption and security.

Collaboration Tools
Send messages to team members and customers on each data or document level or request level.
Status Dashboard
Monitor the status of your all your requests.
File Viewer
Ability to view many different file format such as PDF, Images, CSV, DOCX and much more.

Automated Purging
Data and Documents automatically purged for compliance.
Approval/Rejection
View, approve and reject information and documents.

Automated File naming
Consistent and intuitive file naming for documents uploaded by customers.
Export and Lodge
Export the information collected or directly push to the vault for storage and processing.

Antivirus
All uploads undergo Antivirus and Malware scans for enhanced security and peace of mind.
See More
Perfect For
Application/origination process
Tracking and reporting status
Onboarding new clients
Streamline collection process
Workflow automation
Sensitive data/documents collection
Compliance obligations and security
Document collaboration
Managing new deals
Document workflow streamlining
Secure and Scalable
Enterprise-grade Security
We adhere to stringent information security policies to safeguard your sensitive customer data. Our measures include best-in-class encryption (at rest and in transit), comprehensive audit logs, robust access management, approval-based data access, multi-factor authentication across our business, IP filtering, and more. We are GDPR, PCI DSS, SOC2 Type 2, HIPAA, and ISO27001 compliant, with annual external audits and regular cybersecurity penetration tests.

Scalable Infrastructure
Our robust and scalable infrastructure empowers your business to grow without compromising performance or stability. Our cloud-based technology features highly automated scalability, both horizontally and vertically, within a service-oriented architecture. Additionally, we comply with local data sovereignty requirements, ensuring data is stored locally to meet regulatory standards and protect your information.

Reliable Uptime
Experience industry-leading uptime and availability, allowing you to focus on serving your customers without interruption. We offer 99.97% uptime, live data replication across multiple geolocations, and the option to select preferred data locations based on jurisdiction.

Business Benefits
82
%
Boost in efficiency compared to a manual collection via email.
90
%
Reduction in document processing time through automation.
5
x
Cost reduction based on a semi-automated process with an existing customer.
*Note that the benefits listed above are based on current client outcomes and may vary depending on your specific use case.
Recognised Innovator

Proud finalist for the Australian AI Awards 2025 in the categories - AI Innovator in Mortgage Broking, AI Innovator for Start Up, Best use of AI for Sustainability, AI Innovator in Consumer Banking, Best Use of Agentic AI and finalists for the Smart50 2025 in the categories - Innovator Award, Sustainability Award and Founder of the Year Award.
Frequently Asked Questions
Glossary of terminology used in this FAQ
Data Exchange [Ezidox]: The platform and/or service provider (Us)
Collector(s): You or your team as the primary user of the Data Exchange [Ezidox] platform.
Customer(s): Your customers or clients.
Document Request(s): The method for sending a list of Documents and Attachments to your customer to upload and download.
Custom Template(s): A pre – defined list of Documents & Attachments that can be selected when creating your Document Request.Makes the process of sending a Document Request faster.
Custom Document(s): The custom documents you wish to collect from a customer.
Attachment(s): The documents you wish to send to a customer to read or sign.
How can I benefit from Data Exchange?
How will this FAQ help me and my team?
The philosophy behind this FAQ is to guide a Collector through the normal Document Request flow:
- Registering your new Collector profile (one-off)
- Creating a new Document Request for a new Customer
- Assisting the Customer in uploading documents, in case they are directly sent to the Collector via email
- Reviewing the documents uploaded
- General operations on the whole Document Request, both when in progress and completed
Summary of Data Exchange process
Step 1:
Obtain the Customer details.
- Manual – Obtain the Customer details via call or email and use the Data Exchange [Ezidox] Interface.
- Integration – You can use the Data Exchange APIs to integrate with your website or CRM. For this set-up, you will need access to an internal developer team to help build your ideal Customer flow, and our team is happy to consult on API best practise, please contact support@doxai.co to set-up a consultation call.
Step 2:
Send Document Request from Data Exchange [Ezidox]
- Create a Document Request for your Customer
- Enter the Customer details
- Select the most appropriate template/Individual documents:
- Include the relevant groups and documents
- Add any other person involved in the loan, if any: a co-borrower, a guarantor or simply another person who can upload the documents required on behalf of your Customer
- OPTIONAL – Share the Document Request with a colleague
- Select the documents to send to your Customer as part of the initial email
- Update the notifications settings and enter a welcome message for your Customer
- Check the data inserted and submit the Document Request: it will now be added to your personal list
- The Customer will receive an invitation mail to inform him/her: this will allow him to start uploading the documents
Step 3:
a: Follow up: request for additional documents
- Edit the Document Request
- Select any additional group or document that you need from your Customer
- Save the Document Request
- The Customer will receive an email to inform him/her of the additional documents requested
b: Follow up: send additional documents
- In the Document Request details, you can easily send files to the Customers by uploading them to the Attachment section. Customers will receive an email with the new file, which they can then download from the email or from the Document Request at their convenience.
Step 4:
Complete the Document Request
- Lodge your Document Request to email all the documents to the Lender/third party. This will also change the status of the Document Request to ‘Complete’ and will stop sending reminders to the Customer; you can select the “Complete without Email” option to avoid any email being sent.
- Manually export the documents into your local drive as a Zip File/PDF and change the Status of the Document Request to ‘Complete’ from Actions.
Glossary of terminology used in this FAQ
Go to https://portal.ezidox.com/#/registration and sign up with your email address, select your industry vertical and create a password. You will receive an activation email in your mailbox, follow the link, complete your details, and confirm Terms and Conditions.
- Click on ‘Get Started’; you will be sent to the Data Exchange [Ezidox] website
- Choose a password and click on register
- Accept Data Exchange [Ezidox] T&Cs
- Complete your personal details and click on the Save button
How do I access Data Exchange on a day-to-day basis?
Anytime you want to access Data Exchange [Ezidox], you can login fromportal.ezidox.com or via your Custom URL if this has been configured. Contact our support teamsupport@ezidox.com, to activate a Custom URL and set-up the full white-label experience for your customers/team.
How can I build out my Profile?
- Upload your Profile picture that will be displayed to the Customers
- Change your details
- Input a landline number, which will be shown to your Customers instead of the mobile phone.
- Change your password
Collectors will receive the following notifications:
- Daily update for all Document Requests managed, including:
- documents uploaded
- comments/notes received
- Receive an email notification when a document is uploaded
- Receive an email when a new chat message is added to Requests that you are watching.
- Receive email when a Note is added to Requests that you are watching?
- Receive email when a new Request is shared with you?
- Choose to watch a Document Request when is shared with you
The SMS contains a 5-digit numeric code that users need to enter to be able to login.
- 2 Factor Authentication via SMS can be enabled:
- Collectors:
- at Company level: all the Collectors associated to the company shall enter 2FA to be able to login
- at User level: Collectors can opt-in for 2FA
- Customers:
- at Company level: all the Customers shall enter 2FA to be able to access applications belonging to a company
- at User level: Collectors can opt-in for 2FA
- Collectors:
How can I create a Document Request?
What is the Primary Customer in a Document Request?
Two fields are worth your attention: Reference: It is a free text field.
- Reference: It is a free text field. When you create a new Document Request
- Docs Due Date: it specifies when the document should be provided by the Customer. This field is also used to drive the automatic Customer reminders.
How do I select the documents I need to collect?

How do I add ‘Attachments’ to send to the client?
How do I add additional Applicants to the Document Request?
Once the main Customer is created you can add other applicants who will participate to the current Document Request (e.g. In a joint application – Husband and Wife relationship; Accountant) toggling the second section of the page ‘Do you need to collect documents from anyone else?’. This will expand the section giving you the option to Create an additional Customer. The process is like the Primary Customer, but there are a few differences:
- Can Customer see all documents requested to Additional Parties? When the selection is switched off, the primary Customer will see only their own document list
- What is the role of this Additional Party? If you select ‘Sole Trader’, ‘Company’, ‘Trust’ or ‘Partnership’ the ABN and company details fields will need to be filled out.
- Do you want to notify this Additional Party of this Document Request? When you toggle this off, then the document[s] will be uploaded by you or the primary Customer only
- Can this Additional Party see all documents? If you decide to turn this setting to off, the Additional Customer will ONLY see the documents are being requested to them. They will not be able to see the documents requested from the Primary Customer
How can I share the Document Request internally?
If you have configured more than one user in Data Exchange [Ezidox], you may also decide to share the Document Request with a colleague. Simply select YES under ‘Do you want to share this Document Request with anyone from your organisation?’ and search/select your colleague.
How can I add a custom message to Customers?
This section allows you to include a custom welcome message to your Customers in the invitation email.
How can I adjust the Customer notifications?
- Frequency of recurring notifications [days]: you decide how often your Customer is notified
- Send reminder 3 days before due date: if you have set a Due Date, you can remind your Customer three days before the due date
- Send reminder on due date: you can remind your Customer also on the final day
- Notify Customer when 100% documents have been uploaded
- Send daily digest email: If there have been any changes on the Document Request, an email to the Collector and Customer will be sent notifying those interactions.
How can I save the Document Request as a ‘Draft’?
If you would like to come back to the Document Request and make changes before sending, click on ‘save draft’. A draft of the request will be saved in your portal and visible to you on the dashboard. Once you are done, click on the “Next” button and you will enter the Summary screen
What options do I have to manage the Document Request?
You can go back to the dashboard by clicking the home icon. Here you will see all the Document Requests that you have created or that have been shared with you
- By clicking on any Document Request, you can view its details.
- The Document Requests that need your attention are flagged with a red flag.
You will also start getting notifications in the notification bell to view any change to a Document Request that you are watching!
You can perform the following actions on the Document Request:
- Upload documents
- Chat with Customers for any questions/comments regarding a document
- View the documents or a single document image
- Accept the documents
- Reject the documents
- Download Documents
- Print Documents
Is it possible to upload documents on a Customer’s behalf?
Collectors can upload documents on behalf of their Customers using one of the following options:
- Local System
- Google Drive
- Dropbox
This is a common scenario when the documents are sent to Collectors by their Customers directly via email.
After clicking on the “Upload” icon, a window is presented where the users can decide the upload method. When choosing Google Drive or Dropbox, the user will have to enter his credentials. As soon as a document has been uploaded, the document status will change to “Uploaded”
If multiple images or documents files are uploaded against a single document placeholder, they will be merged and stored as a single file.
How can I communicate with Customers in the portal?
You can send and receive chat messages/comments related to the specific document using the chat option.
You just need to type the message and press enter to send it to the Customer.
How can I view the documents a Customer uploads?
- You can view the documents by clicking on the “View” button at document level. The document/s will be displayed in the PDF Viewer.
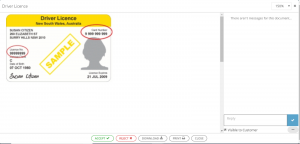
- Accept
- Reject- Download
How do I ‘Accept’ documents?
- Collectors can Accept their Customer’s document by clicking “Accept” button for the respective document in the PDF Viewer seen before
How do I ‘Reject’ documents?
Collectors can Reject their Customer’s document:
- By clicking “Reject” button for the respective document in the PDF Viewer.
On clicking the “Reject” button, you will be asked for a Rejection reason. The rejection reason will help the Customers in understanding why the document uploaded was rejected; you can also enter a free text comment. And you can notify your Customer also via email checking the “Send email notification” flag
The Rejection reason will then appear in the Document Request details below the document rejected, for both you and your Customer. The same message will automatically show also in the chat section for the respective document.
How can I download documents?
Collectors can download documents by clicking on the “Download” icons.
Can I print documents?
Collectors have the possibility to print the individual documents. To achieve this, please select the one you need and open it using the Eye icon. Once in the PDF Viewer you will find the Print icon
How do I ‘Edit’ a Document Request?
Sometimes Collectors may need to access a Document Request to modify or correct it. For example, you may need to correct the Customer’s phone number, a misspell, Add an additional Customer to the request, etc.
The Edit button gives you all these features in an effortless way.
How can I change status of the Document Request?
By clicking on ‘Actions’ in the Document Request dashboard, you will be able to change the status of the Document Request.
While the Document Request is under ‘In Progress’ status, Data Exchange [Ezidox] will keep sending the automatic reminders, so if you already have the documents that you need for the loan, then you can manually set the Document request to ‘Complete’.
As an alternative, if you want to stop Data Exchange [Ezidox] from sending the automatic reminders
How can I share Document Request with a colleague?
Collectors can share the Document Request with another Collector using the “Share Document Request” feature. Please click “+” button in the Document Request details screen and select the “Share Document Request” tab, select the colleague in the existing list and click on “Share” button.
How can send additional Attachments to a Customer within a Document Request?
Using “Send Attachments” feature, you can send additional documents to the Customers.
Existing documents:
- To send an existing document, simply click on the “+” icon, select the listed documents, check the respective documents, and click “Send” button.
If you have integrated Data Exchange [Ezidox] with an electronic signature platform, you can send a document to be electronically signed from here! Simple check ‘eSignature’ to YES and select the document.
New document:
- To add new document, click on the “+” icon choose the “Add New” option and add a new document.
- Type the document name, description and upload it.
How can I export the documents?
Collectors can export all the documents as a zip file or PDF by clicking on the “Export” button
If zip file is selected, all the documents will be exported as Individual Files. The folder structure and naming will be the same as the one that is in the Data Exchange [Ezidox] template, so no need to rename and index them!
If PDF is selected, one large PDF file will be exported with all the documents merged into one.
How do I ‘Lodge’ the Document Request?
Collectors can lodge the Document Request when all the required documents have been uploaded and verified by clicking the Complete/Lodge button.
This will send an email to the email address specified with the documents attached as a pdf or zip file (depending on what you choose). You can select the “Complete without email” option to avoid any email being sent or you can choose “Enter Email Address Manually” where it will give you the option to manually include the recipient. In this case you can decide the size of the email to meet the restrictions of the recipient you are sending the documents to.
If required, we can add a specific email address to the list, to ensure that lodging a Document Request will only be sent to the desired email address.
Once a Document Request is lodged, any reminder notification sent to your Customer will stop, as the status will be changed to Lodged/Completed.
How can I view and resend the email notifications sent to a Customer?
From the Document Request dashboard, open the ‘Notifications’ tab next to Documents. You will see a list of all the emails and SMS that were sent to any stakeholder involved in the Document request (Customer, Colleagues).
To View the email, click on View (You will access a secure copy of the email, and for security reasons, you will not be able to click in the Links to access the portal.
If you need to resend, simply click Resend, and the exact email will be sent to the Customer/colleague.
How can I access the Data Exchange settings?
To access Collector settings, click on your Name on the top right section of the screen, and select ‘Settings’.
This screen will show you the Settings Items, which depending on the Security Role you have been assigned, it will show you more/less items.
When you create an account on Data Exchange you will automatically be the admin for the portal. This allows special permissions to help build out your Customer & Team experience.
How can I set-up my company?
Enter in the following information to create your company account:
- Name
- Entering your company name will create the company account and allow you to invite users to join.
- Description
- Website
- Logos
- Adding a logo will ensure your Customers see your brand in the portal and on the automatic notifications.
- Sender Authentication
- Allow Customers to view their Document Requests without entering credentials?
- If Yes, Customers will be able to access the portal without needing to create a Data Exchange [Ezidox] Customer Account.
- Allow Customers to view their Document Requests without entering credentials?
What can I see on the Dashboard?
The dashboard will show basic reporting & statistics regarding the Document Requests created by the team.
How can I set-up developer access to the APIs?
Developers section is used to create and maintain API keys and Secret to integrate with other platforms.
To enable Developers:
- Go to Settings choose “Developers” option from the left navigation menu and click “Add new+”, you will be directed to a new pop-up window.
- Enter the mandatory Fields “Name” and Ip Address.
- To access the specific API Documentation with examples and step by step guide, please email us atsupport@ezidox.com
How can I see all Document Requests created by my team?
You can see all Document Requests created by your team under ‘Document Requests’ in the left-hand navigation. This view is only visible by team members with the ‘Admin permission level. You can search and access Document Requests from here.
How can I manage user access?
Admin can invite other Collectors to join with the “Invite New Collector” button in the top right corner
Administrators can also choose if the role of the new account:
- Admin
- Collector
- Assistant
- Helper
Administrators can Enable/Disable other users from the Collectors section in the “Users” screen. You can also see if a Collector has joined or not.
On clicking “Disable” for the user, the account will be disabled. The user will not be able to access their account.
When the admin clicks “Enable” button, the user account will be reactivated.
Admin can see the detailed the list of all the sender in the “Senders” section of the “Users” screen.
How can I create a ‘Custom Template’?
Select “custom template” option from left-side menu and choose to create “new+”. You will be directed to the custom template setup page.
In the first tab ‘Name and Welcome Message’, Enter the Name of the Template (e.g. Home Loan template – PAYG), add an optional description, select the Sharing level, and add a specific ‘Welcome Message’ linked to this specific template. This way, you can have different default messages when you create a Document Request based on the Template that you choose. You will also be able to include dynamic content in the email by selecting ‘Template Placeholders’ such as ‘Name of the recipient’ ‘Creator Name’ that will be replaced with the respective details.
In the “Groups & documents” section you will be able to create the template structure of the document checklist. You can create distinct groups to group documents by category (e.g. Proof of Identity, Income, Liabilities, etc.) and in each group you will be able to add multiple documents to collect (Drivers Licence, Passport; Pay slips, Bank Statements) You can choose if you want the group/document to be selected by default, by checking the ‘Is Selected by default’ box. In the case that the group is not selected by default, when you start a new Document Request and load this template, you will be able to select the Group but will not be included by default. Useful if you do not normally need a specific type of group/document but you still want it to be there.
To Create a Group, simply type a name and description. Search for a document to collect from the list on the right and click the + button to add it to the group.
In the third tab ‘Attachments’, you can link specific documents to send to this specific template. This means that, if you select an Attachment from this list, whenever you start a new Document Request and select this template, the Attachments selected under this list will be included by default.
How can I create a ‘Custom Document’?
You will be able to manage your own documents to request library in Data Exchange [Ezidox]. To do so, you will need to:
Select “Custom Documents” option from navbar menu and choose “create new+” on the top right corner.
You can also edit an existing custom document by choosing the edit option.
You will be directed to the custom document setup.
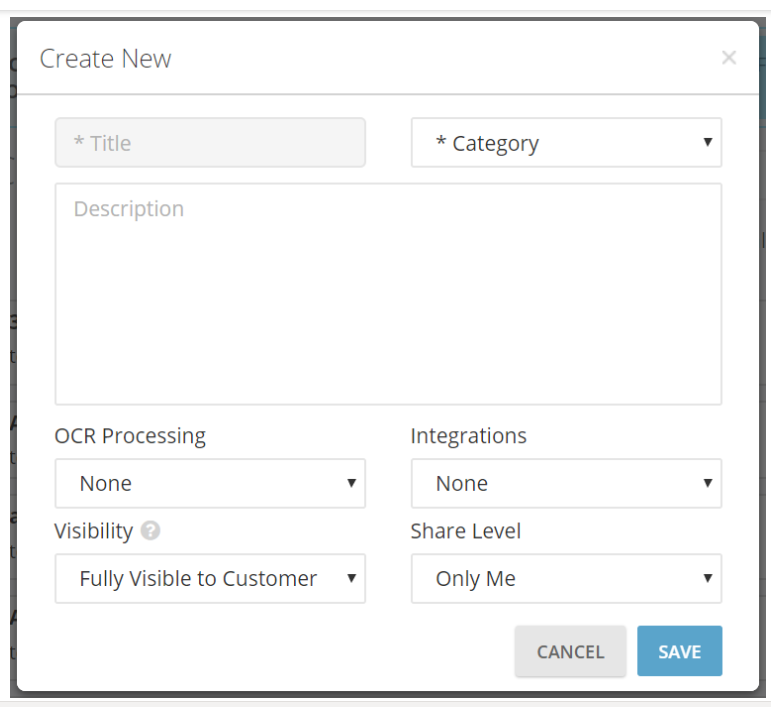
- Title: Name of the document to request. (e.g. Individual Tax Return)
- Category: Select a category appropriate to the specific document you are creating. (e.g. Financials)
- Description: Use this section to describe the properties of the document you request (e.g. Please upload your most recent Individual Tax Return. Please make sure your personal details and annual income is visible)
- OCR Processing: If the TFN needs to be removed please select TFN Removal Option. Data Exchange [Ezidox] has Optical Character Recognition tool embed, that will search for the words TFN or Tax File Number and it will redact it automatically from the document!)
- Integration: If you have integrated Data Exchange [Ezidox] with any of the Bank Statements third party service providers (DocuSign, Proviso, Mogo Bank Connect, Cashdeck, Credit Sense), you will need to flag the document, so it loads a different modal whenever a Customer wants to upload a file against this document.
- Visibility: Three levels of visibility are currently available.
- Fully Visible to Customer: The document can be uploaded and is fully visible for both, Collector and Customer. Document is included in the progress bar calculation.
- Customer List Only: The document is fully visible for both, Collector and Customer, but only the Collector can upload. Document is included in the progress bar calculation.
- Collector Only: The document is only visible for the Collector. Document is not included in the progress bar calculation.
- Share Level: Select ‘Only Me’ if you are the only one that needs access to this document. Select ‘My Company’ if you want to share it with your Team!
How can I create ‘Attachments’ for the Customer to view or sign?
Go to the Attachments section in the left part of the screen.
Click on the “create new +” button located on the top right corner. This will direct you to a new popup window. Enter the details (Name, Description).
If you want this Attachment to appear by default every time you create a new Document Request, simply check the field “Include when creating new Document Requests”.
To create an Attachment with e-signature, click on the small arrow next to ‘Select Integration’.
Once done click on the Next button to upload the file form your Local Drive, Dropbox, or Google drive
If you have not selected an integration the process is completed.
If e-signature process is selected, follow the below steps.
Click on the small arrow next to the template and select create new template. This will direct you to your e-signature provider. Follow the steps shown to enable the template.
What systems can Data Exchange integrate with?
Data Exchange [Ezidox] enables integrations with third party apps for ease access of document collection.
- Bankstatements.com.au
- DocuSign
- e-sign live
- MogoBankconnect
- Credit Sense
- Zapier connect
- Embed any form or web page directly into Document Request
In all the integrations, you will need an active subscription with the third-party service.
How can I Integrate Data Exchange with bankstatements.com.au?
To activate bankstatements.com.au integration, Go to Settings -> Integration, and click Activate. Enter your four/eight-digit referral code and save the settings. Once the integration is active, you will need to tell Data Exchange [Ezidox] which Custom Documents needs to be treated as a bank statement. To create a bank statement document, go to Settings choose Custom Document from the left navigation menu and click on “Create New”; a pop-up window appears and enter name, category, and description (optional). In the “Integration” Drop-down, select BankStatements.com.au option and set the shared level to my company if you wish the custom document to be accessed by other Collectors of your organization and save it. Once successfully created, you will be able to add it to your custom templates and Document Request.
How can I Integrate with DocuSign?
To integrate with DocuSign, go to settings from your Data Exchange [Ezidox] account choose integration from the left side navigation menu an activate DocuSign. Enter your credentials for either your development or production instance (production and development instances will have different credentials) as shown in the pop-up screen and save the settings. Once you have completed the configuration on Data Exchange [Ezidox] side, the remaining must be done on DocuSign portal. Go to your DocuSign Admin panel, under Integrations -> Choose Connect to add a new connector. This is required to upload the documents back into Data Exchange [Ezidox]. Select Add Configuration -> choose Custom Now, in the settings enter the followings: • URL: https://api.ezidox.com/api/ESign/Docusign • Enable Log: Yes • Require Acknowledgment: Yes • Associated Users: Select Users to Include and select the user you have entered in Data Exchange [Ezidox] • Envelope Events: Envelope Signed -> Completed • Recipient Events: Recipient Signed -> Completed
How can I embed any Form or Web page directly into Document Request?
- Under Integration, choose Activate “Embed any form or web page” there is No setup required at this stage. The next step is to create a custom document to embed the form or web page directly
- Go to Settings and choose Custom Document from left side navigation menu and click on “Create New” or choose an existing document to configure; enter name, category, and description.
- In the “Integrations” Drop-down Select Generic Form and configure integration. Enter the following Details and save the settings
- a. Enable Yes to “Allow Collector to customize the Form URL”; If you want your team to be able to edit the link in each Document Request.
- b. Enable Yes to “Allow Customer to mark the form as completed”; If you want Customers to notify you when the form is submitted (if you have a way to submit the form in PDF back to Data Exchange [Ezidox] let us know and we can close the loop via API services)
- c. Form URL: URL of the form (https//)
- d. Display Chat in the Form Viewer: enable Yes If you want to show the chat in the form viewer Once successfully created, you can then add it to your custom template.
How can I integrate with OneSpan?
Live Instructions to follow in OneSpan portal: Access the Admin section of the OneSpan portal from your control panel and choose integration menu.
Locate the API Key and copy it – you will need to paste it in Data Exchange [Ezidox], In the Callback URL field, enter “https://api.ezidox.com/API/ESign/ESignlive” In the “Select Events” section, enable Document Signed and Transaction Completed. Save the settings.
Once you have completed the configuration on OneSpan side, the remaining must be done on Data Exchange [Ezidox]. Instructions to follow in Data Exchange [Ezidox] portal:
- Go to your Username -> Settings -> Integrations -> “Activate” under OneSpanLive Then you need to enter your API Key that you collected before, for either your development or production instance (production and development instances will have different credentials) in the pop-up screen as shown below.
- You will be using a ESignLive Production Instance; you can confirm this by checking your ESignLive login page. If it is “https://apps.esignlive.com.au/login” then you are using the Production Instance. If instead it is “ https://sandbox.esignlive.com/login ” then you are on the Development instance.
- Then save and you have now integrated Data Exchange [Ezidox] with OneSpan live.
How to integrate and configure with MOGOBankconnect?
Go to your Username -> Settings -> Integrations Choose to activate under MOGOBankconnect and you will be directed to a Pop-up window.
Enter the details and save the settings, a confirmation box on bottom left will be displayed Once successfully saved you can start configuring MOGOBank integration into the Document Request
To create a MOGOBank configured document
- Go to Settings choose custom documents, select “Create New”, enter Name, Category and Description (optional).
- Once the settings are successfully saved you will be able to create the Credit Sense integrated custom document
- To create a Credit Sense enabled custom document
- Go to Settings choose custom document an select Create New+ option from the top right corner, you can also integrate for an existing custom document by choosing the edit option.
- In the custom document menu, enter the details an choose the integration level to Credit sense and save the settings. Once successfully configured you will be able to add it to your requesting documents.
How do I integrate with Credit Sense?
- Click on the activate button under Credit Sense to enter your store code an save the setting.
- Once the settings are successfully saved you will be able to create the Credit Sense integrated custom document
- To create a Credit Sense enabled custom document
- Go to Settings choose custom document an select Create New+ option from the top right corner, you can also integrate for an existing custom document by choosing the edit option.
- In the custom document menu, enter the details an choose the integration level to Credit sense and save the settings. Once successfully configured you will be able to add it to your requesting documents.
How do I integrate with Zapier?
- Sign into or create an account with Zapier if have not already.
- To use the Data Exchange [Ezidox] connector ensure you have activated Zapier within Data Exchange [Ezidox] and then enter the API Key and Secret within Zapier.
- Begin setting up triggers and actions to carry out tasks for you. You can create your own workflow between Data Exchange [Ezidox] all your apps.
What audit capabilities does Data Exchange have?
Data Exchange [Ezidox] keeps an audit trace of every interaction a User does in the system (e.g. login, upload, download, delete, etc.). Admin users can access this audit trace from Audit section.
How can I manage Roles and Permissions?
As introduced before, Admin Users can create their own Roles by linking different type of permissions. We recommend cloning an existing role and modifying the permissions to create a new role, this will ensure you retain important configurations.
To clone a Role and create a new one:
- Go to Roles and Permissions
- Click “Clone” from an existing one (e.g. you may want to extend functionality for the Existing Collector Role and Bypass the IP whitelist to allow the user to access from any location)
- Give a relevant Name. E.g. Collector – Bypass IP and define the Share Level.
- Check/uncheck the permission/s you want to add/remove. From the previous example, check the Permission: “Collector – Bypass IP Address Whitelist Check”
- If the user needs access to Document Requests, set flag ‘IsAdmin’ to yes
- Save the New Role To assign the new role to a specific user:
- Go to Settings/Users
- Click on Edit
- Select the Role that you want to apply. The new permissions will be applied straightaway. The user will need to log out and login or refresh to see the new configuration.
How will my Customers experience Data Exchange?
Once the Document Request has been created, Customers will receive an SMS and an email invitation.
Customers can access their Document Requests by clicking on the link in the email or on app.ezidox.com
There are 4 different authentication methods for the Customer to access the Document Request, by default, the ‘Anonymous’ is selected.
-
- Anonymous: Customers can access the application by clicking on the email link received. Customers will not be allowed to download any of the documents uploaded or Attachments received unless they register/login.
- Anonymous + 2FA confirmation: Same as anonymous; in addition, Customers’ identity will be confirmed by an additional unique SMS code sent to their registered mobile number.
- Username + Password, with Opt-In 2FA
- Social Logins (can be enabled/disabled for each company): Google Login
- They can perform following actions, that we are going now to explore in detail:
- View his Document Request details such as:
- Document Request progress percentage
- Document Requests Name & Contact Details
- Reference number
- Documents due date
- List of documents requested by the Collector
- Upload documents
- Chat with Collectors for any questions/ comments regarding the document
- Track the status of their document
What notifications will my Customers receive?
Customers will receive the following notifications:
-
- Daily Summary for:
-
- documents rejected
- new Document Requested
- documents sent by the Collector
- comments received
*Only sent if there have been any changes to these list
-
- Daily Summary for:
- Recurring reminder, if the Document Request is not completed, listing:
- documents rejected
- documents pending (e.g. requested but not yet uploaded)
- Reminder 3 days before Document Request due date, if the Document Request is not completed and the due date is set
- Reminder on the day the Document Request is due, if the Document Request is not completed and the due date is set
When a Customer wants to stop the email notifications, they can go to the top right corner of the screen. Clicking on their name will open a menu where it is possible to see the “My profile” option
Under “Settings” section they can enable or disable the notifications.
Need further Information?
Please do not hesitate to reach out to sales@doxai.co, we are happy to help you if you need further assistance.
We enable businesses to automate processes with our AI-driven digital solutions.
Ready to Get Started?
Fill out the form, and we'll reply soon.


