How to create an inspection?
- Click on “New Inspection” and provide Seller details, Buyer details and select the asset, state, inspection type, ownership type. Provide the deal/loan/lender reference number, Asset description and Asset value.
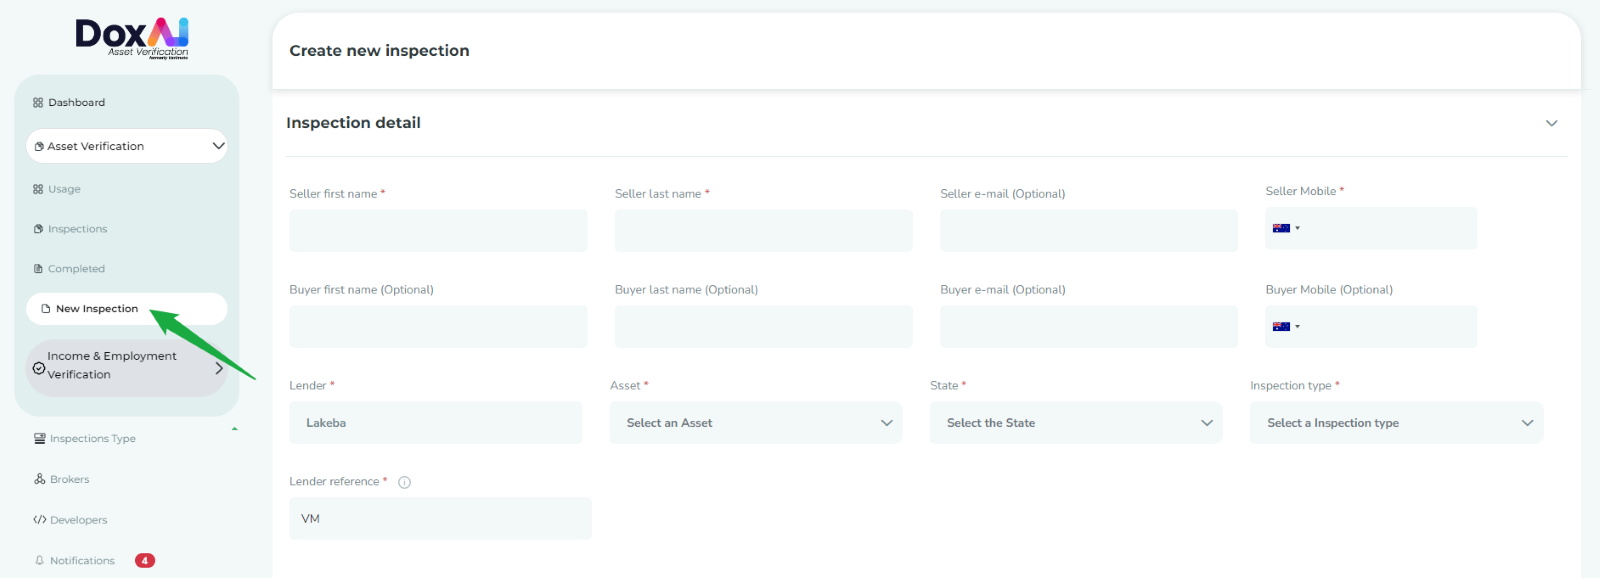
- The provided value in “Asset value” will be reflected in final report.
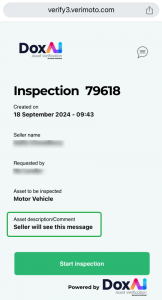
- The Asset Description/Comment field allows you to provide asset descriptions or instructions for the seller.
- Include additional inspection details under “More Information.”

- You can also share the inspection with other users from your company by searching them by Name, Surname or Email. By sharing the inspection, you allow those users to edit/delete the inspection.

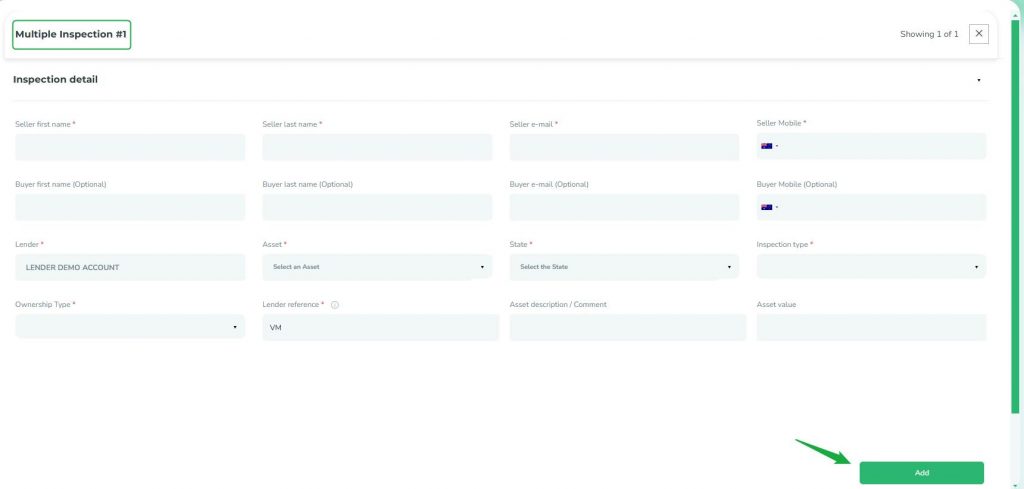
How to create bulk inspections?
To create bulk inspections, follow these steps:
- Navigate to “Multiple Inspections” from the left menu.

- Enter the required details for the inspection and click “Add”. This will add the inspection to the multiple inspections queue and will navigate you to the multiple inspection draft screen
- Click “Add Inspection” from the top right corner to add another inspection to the list. The new inspection will be populated with the previous inspection’s details. Review and edit as necessary, then click “Add”. On click “Add”, this inspection will get added to the multiple inspection queue and you will be navigated to the multiple inspection draft screen.

- Repeat Step-3 to add more inspections to the queue
- Once all required inspections are added, click “Submit” from bottom right corner to finalise them
After submission, sellers with the same email address will be able to complete all their inspections from a single web app link. If there are inspections for different sellers in the queue, those sellers will receive separate notifications to complete their inspections.
Sellers with multiple inspections created for same lender will complete the ID section once.
How do I activate a new inspection type?
The Lender Admin will have access to activate a new inspection type from the “Inspections Type” tab. By default, “New Lending” Inspection type will be activated for all the assets with all the available documents. You can customise the document list of each inspection type for each assets & state and activate any of the predefined inspection types-
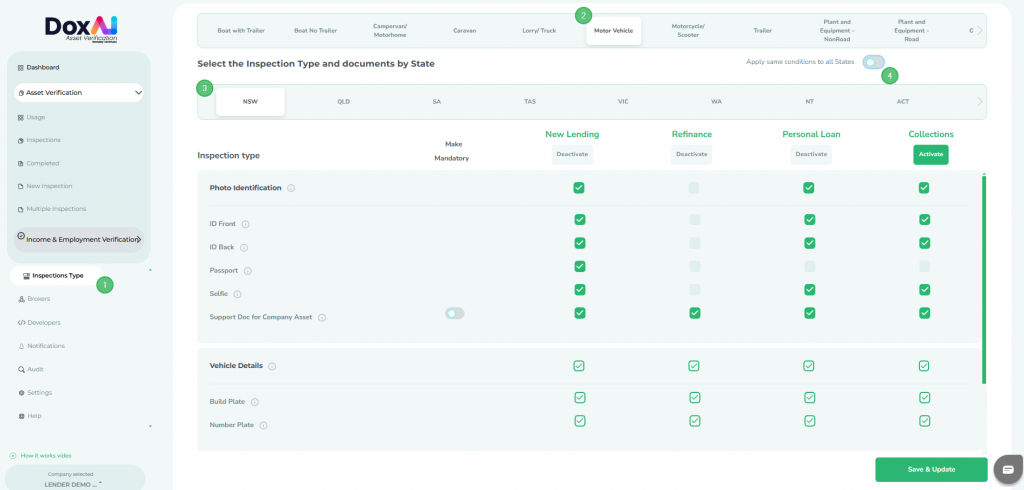
- Go to “Inspection type” tab
- Select the “Asset” and “State” you want to customise the document list
- You can also select “Apply same condition for all state”, if you want to keep the same document list for each state
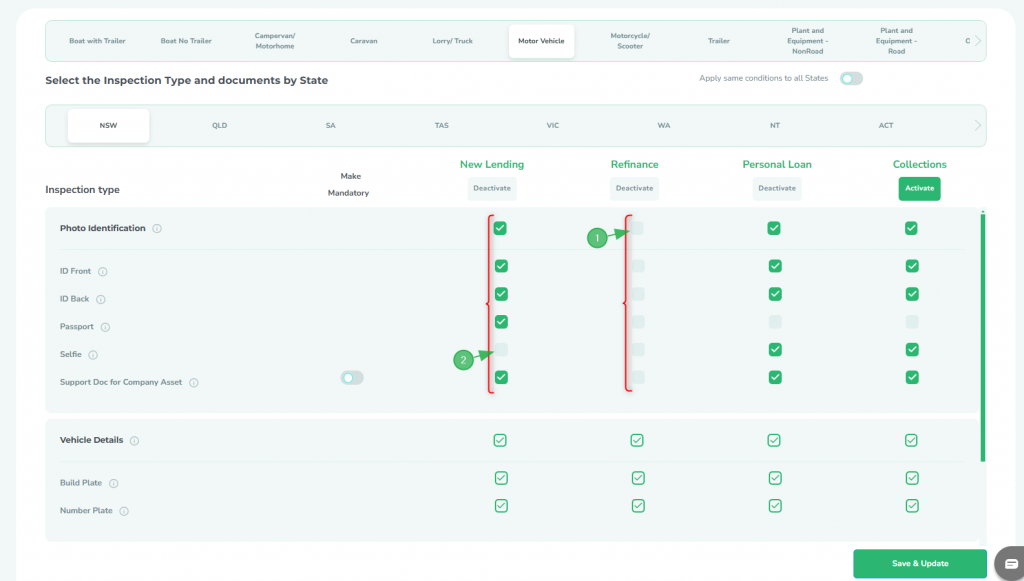
- You can Select/ Unselect the entire document section
- You can Select/ Unselect individual documents under document section
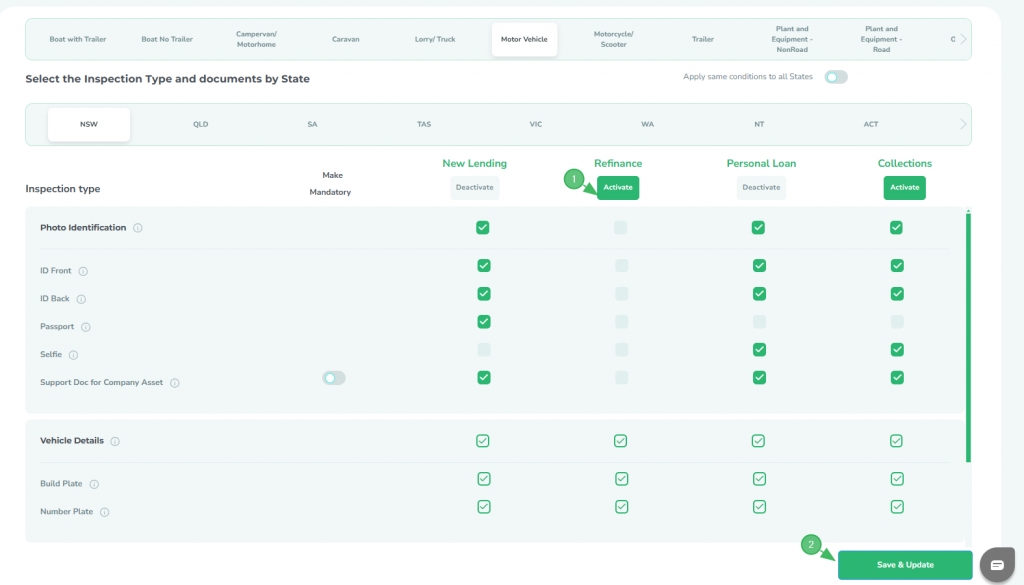
- Once the document list is finalised, click the “Activate” button to activate that “Inspection type”
- Click on “Save and update” to save the changes. NOTE: These changes will be reflected in the new Inspections created for your company by brokers OR from your Lender company.
You can also deactivate any Inspection type by clicking the “Deactivate” button-

Meaning of different status of the inspection
- Created: After inspection has been created by the broker/lender.
- Started: After the seller has provided the 6-digit OTP in the web app and progressed to upload the documents.
- Submitted: After the seller has uploaded and submitted all the documents via web app.
- Completed: After the support team completes the document review and generates the report.
- Rejected: If the support team rejects any document submitted by the seller.
- By-passed: If the support team has rejected any document but the lender has requested to bypass OR approved a bypass request from broker to accept the same document.
- Cancelled: After the initiator cancels an Inspection from the “Edit inspection” tab.
- Suspended: After the support team suspends any inspection based on the request from the initiato
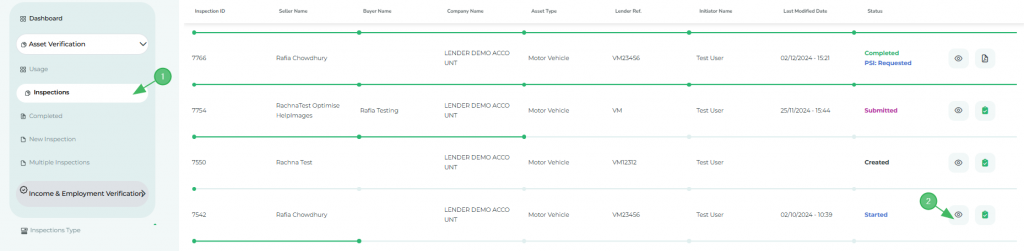
How to View inspection details and its progress?
Go to “Inspections” tab and select “View details” of the inspection.

NOTE: If you are an admin user, you can also view the Activity log, Edit Inspection and Send reminder tab for the inspections created by other users from your company.
Lender admins have an option to make all inspections visible to all the users within the lender company. If this option is turned on, all lender users will have access to any inspection created for that lender company.
If the inspection was created by a third party (external) broker for your lender company, in “View details” you can track the Inspection progress.
How do I edit the created inspection?
Go to “Inspections” and select “View details” of the inspection
In “View details”, click on “Edit Inspection”.
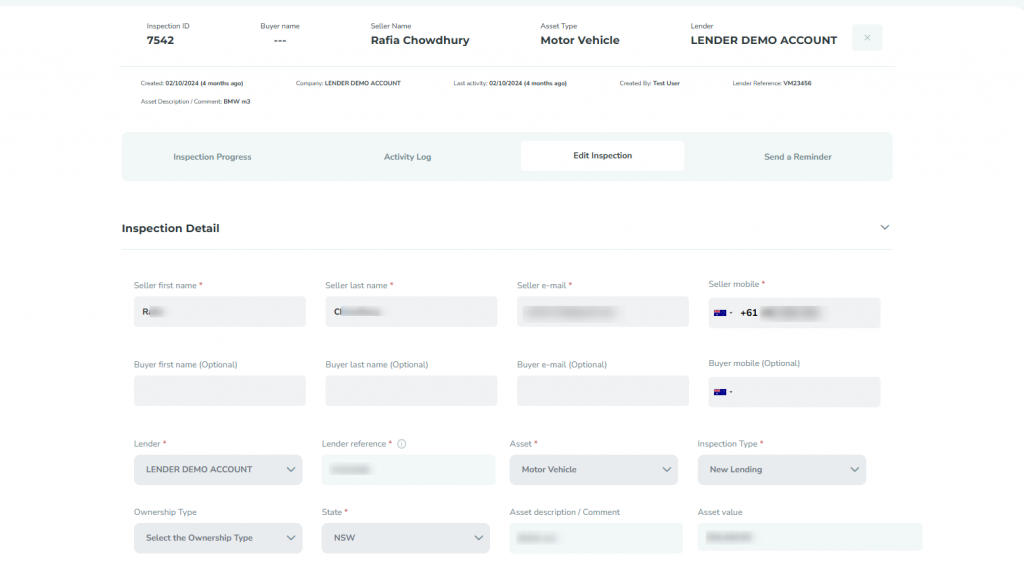
You can edit seller details if the inspection is in “Created” status. If seller started working on the inspection, you can’t edit seller details. You can also edit the lender reference number before the inspection is Completed/Cancelled.
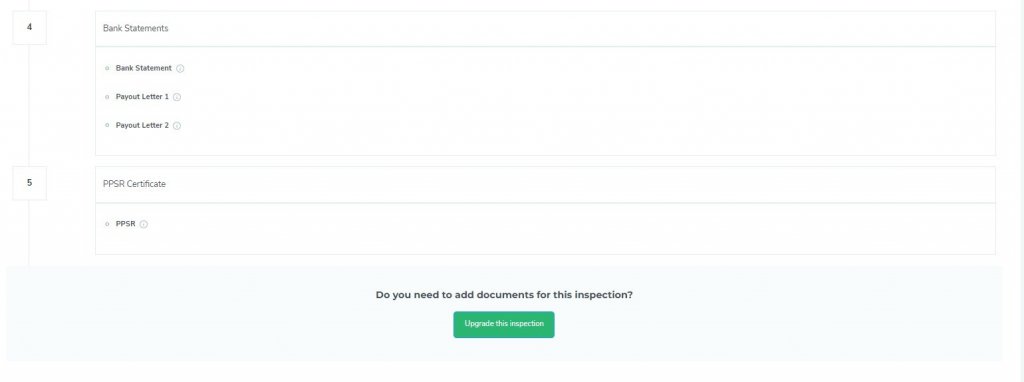
If you have multiple inspection types activated, then the inspection with “Created” status can be edited to change the inspection type using Upgrade this inspection option under Document required section.
How to delete an inspection?
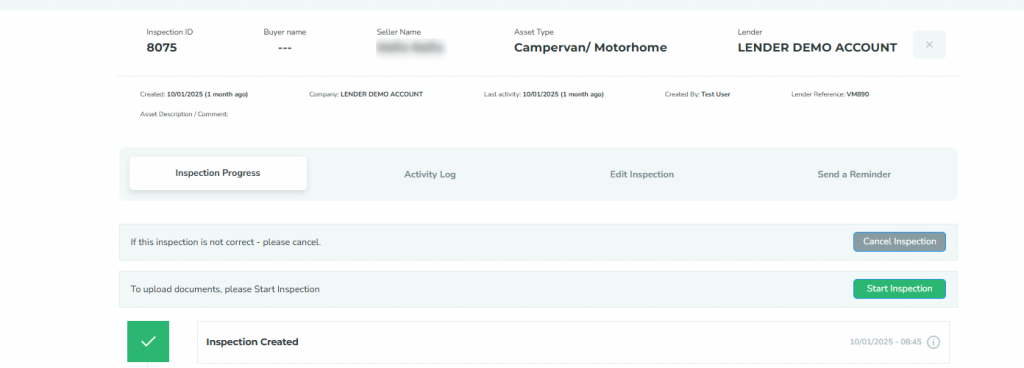
Go to “Inspections” and select “View details” of the inspection. In “Inspection Progress”, click on “Cancel Inspection” to delete the inspection. You can cancel an inspection if it is “Created” status
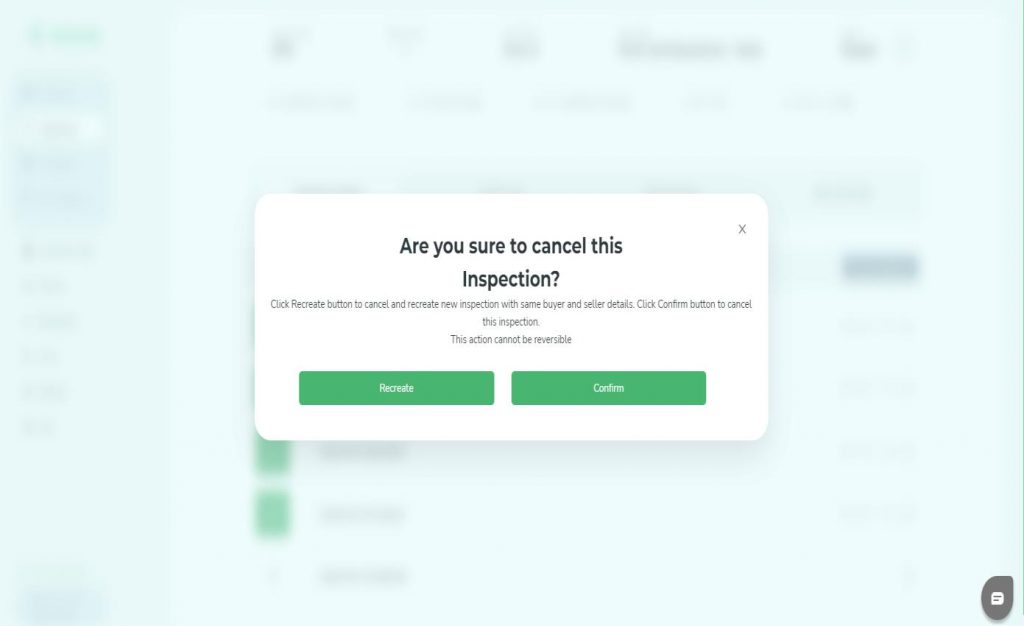
On clicking “Cancel Inspection”, you will have an option to recreate a new inspection with the same details in editable format or confirm the cancellation of the inspection.
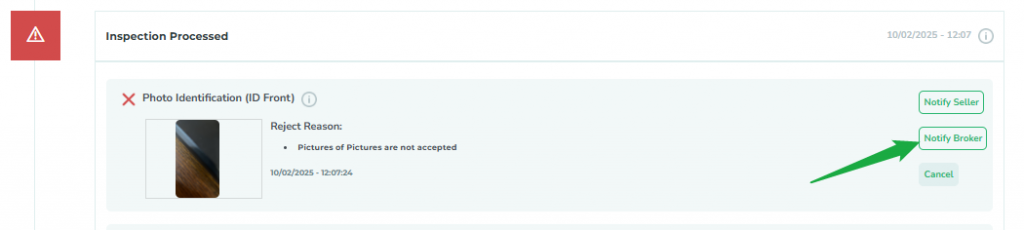
How to view rejected documents, notify seller/broker or request bypass?
If any of the seller’s uploaded documents get rejected, the seller of the inspection will get notified and the respective inspection will have “Rejected” status.

Click on “View details” of the rejected inspection, to view the rejected documents. You can also use the “Notify” button to send
a customised message to the seller’s email OR the broker’s email (if the inspection is created by a broker).
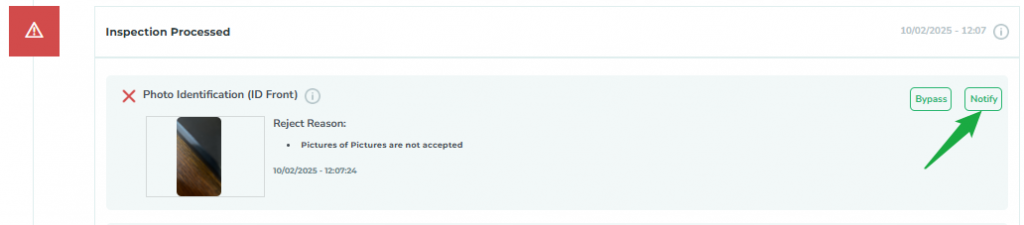
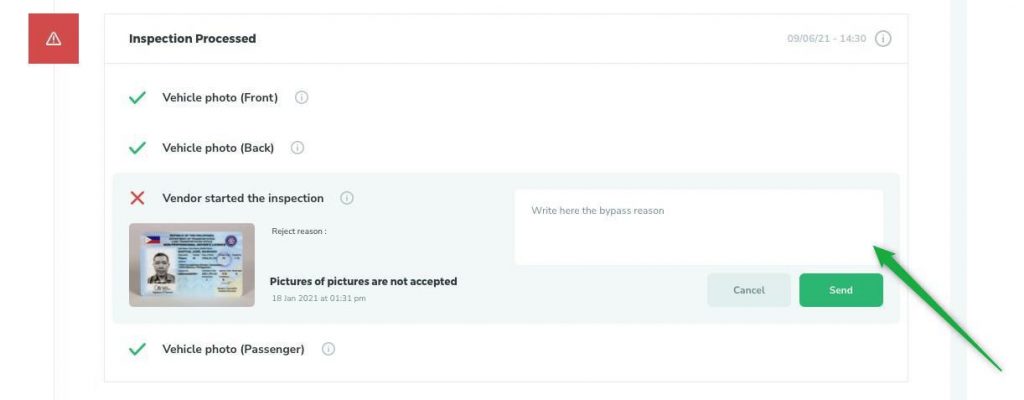
To request admin to bypass a rejected document, click on “Bypass” and mention reasons for bypass before sending the request to admin.
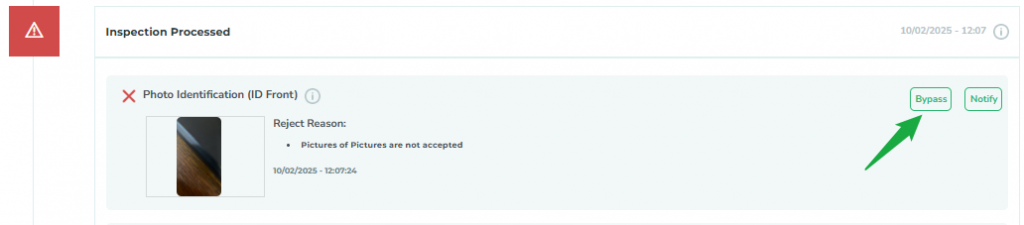
Note: This bypass reason will also be reflected in the final report.
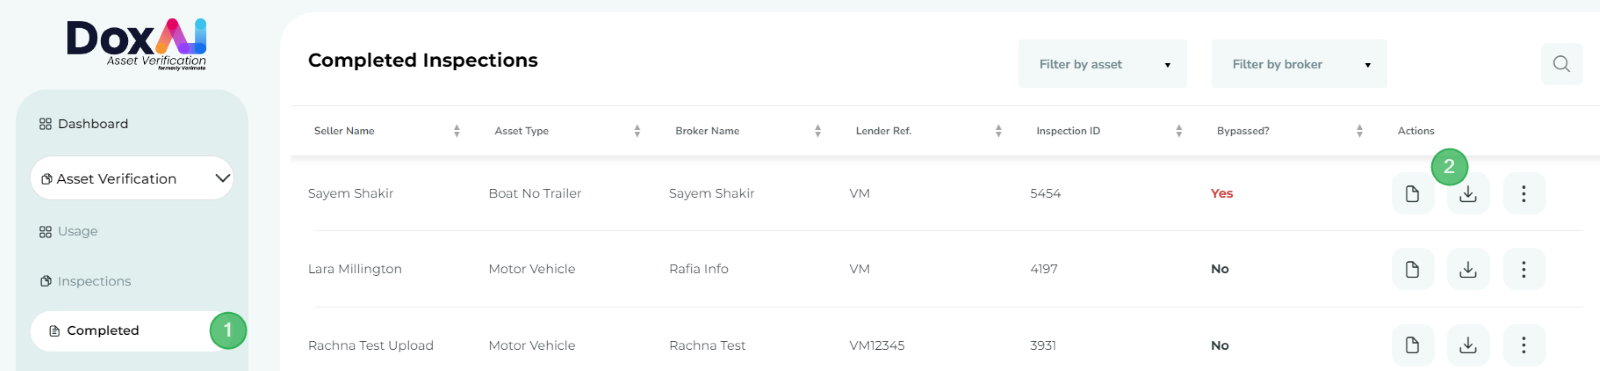
How to Download a report?
- Go to “Completed” tab from left menu.
- Click on “Report” to download the report.
How to Download monthly inspection summary?
To download monthly inspection summary, navigate to the “Inspections” tab, click the download button in the top-right corner, and select the desired month. The system will generate and download an Excel file containing the details of all inspections created that month.
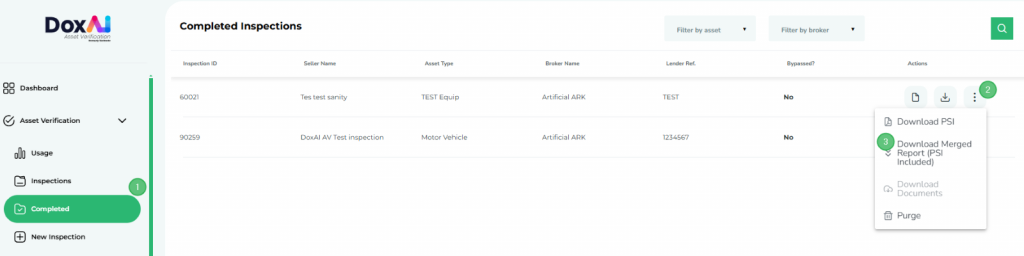
How to Download final inspection report with signed PSI in one PDF?
To download final inspection report with signed PSI in one PDF, navigate to the ”Completed” tab, click on the three dots under the ”Actions” column, and select ”Download Merged Report (PSI Included).
How to invite new users to join your company?
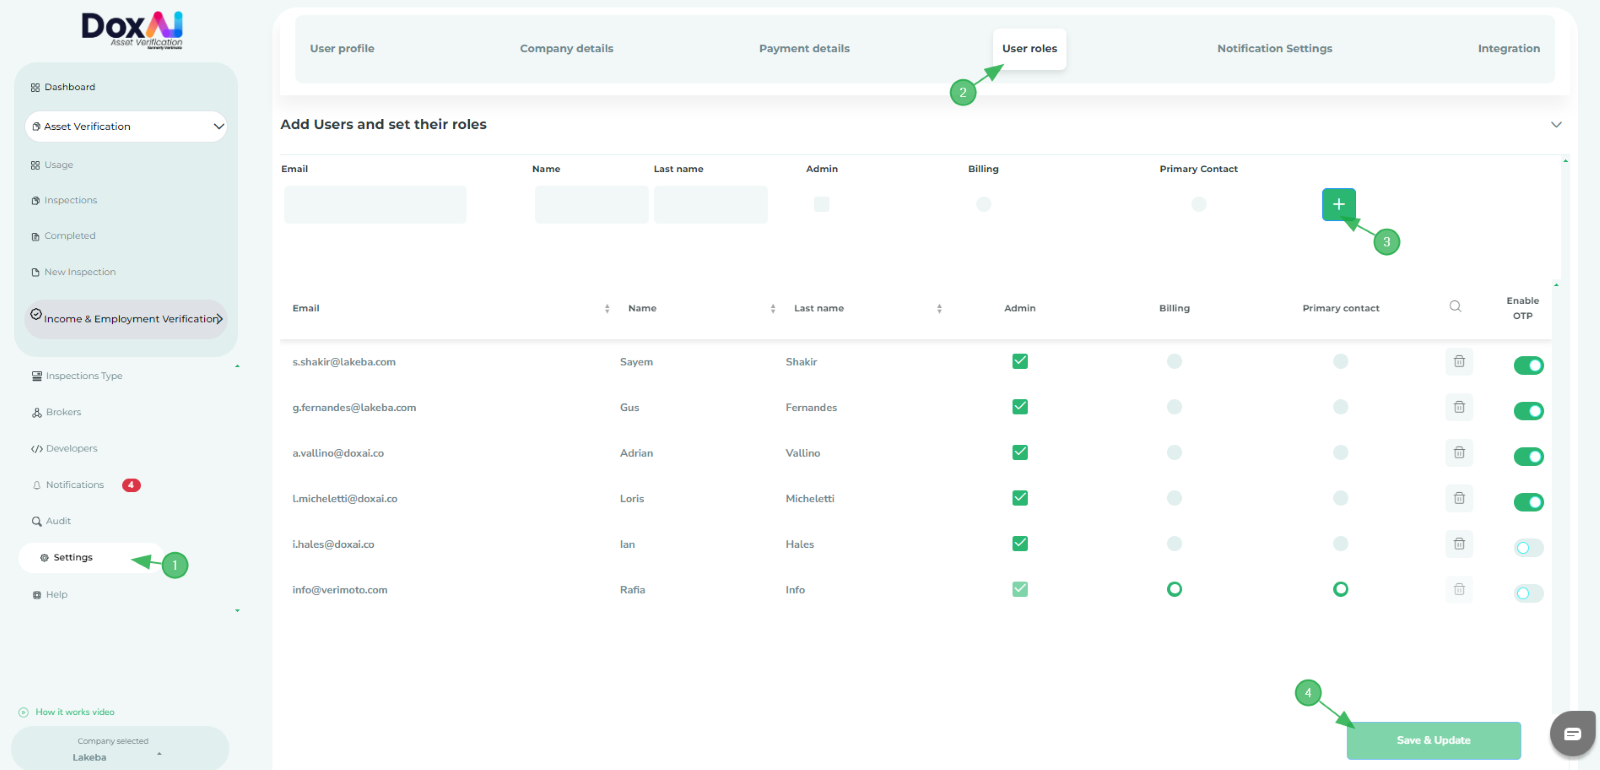
- Go to “Settings” and click on “User roles”.
- Provide the user details, Email address, First name, and Last name. Also assign the roles to the user (Admin, Billing, Primary contact).
- Click “+” button to add this new user. You can add multiple users to the list using this button.
- Finally, click “Save & Update” button.
- Added user(s) will receive an invitation email to join your company. Once the user completes the onboarding process using that invited link, they will get added as the lender in your company and can create new inspections.
- User Roles:
- Admin: The user with this role will have full portal access, can manage users, create inspections, and multiple admins can exist in one company.
- Billing: Will have access to add/view/delete the payment methods and create inspections. Only one user can become billing responsible.
- Primary contact: The primary contact is the main escalation point for support and queries, has access to all portal features except the payment section, and will be contacted by the support team for any issues; only one user can hold this role.
How to set your visibility among all Brokers OR limit it to your Lender Users only?
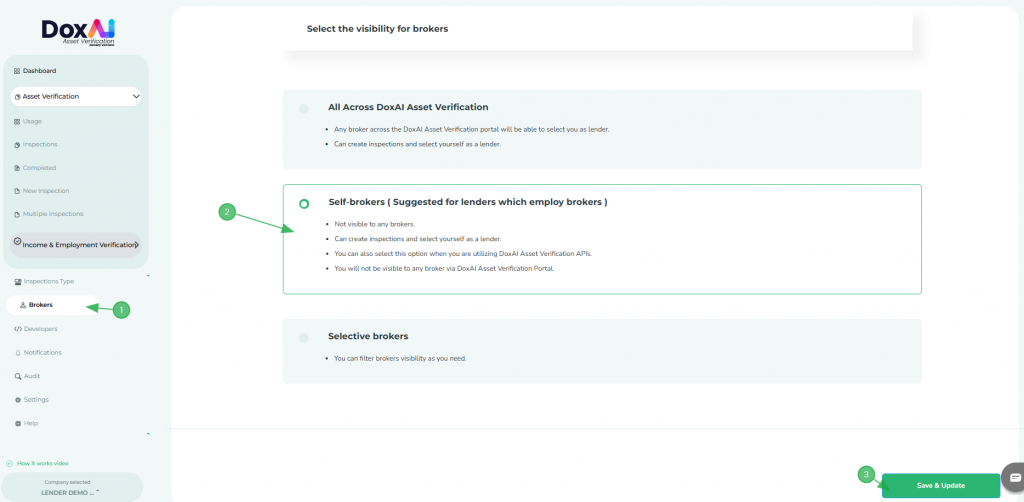
Visibility with just the company’s users: If you want to set your visibility with just the lender users within your company-
- Go to “Brokers” tab.
- Select “Self-brokers”.
- Click “Save & Update”
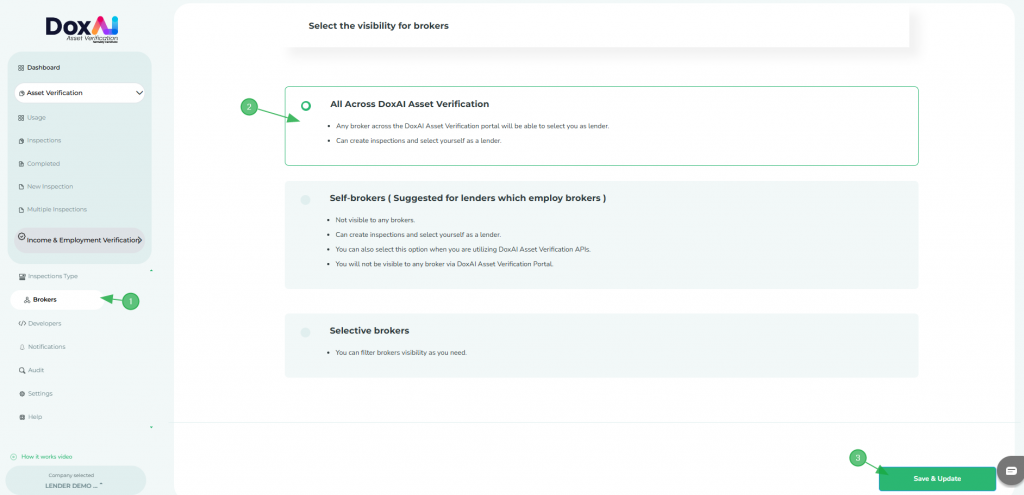
Visibility with other Brokers in DoxAI Asset verification: If you want to set your visibility with All the brokers-
- Go to “Brokers” tab.
- Select “All Across DoxAI Asset Verification”.
- Click “Save & Update”.
If you want to be visible to specific Broker companies, select “Selective Brokers” and click on “View companies and brokers”

- Search the name of the Broker Company.
- Turn on the toggle button on the left for the companies you want to be visible to.
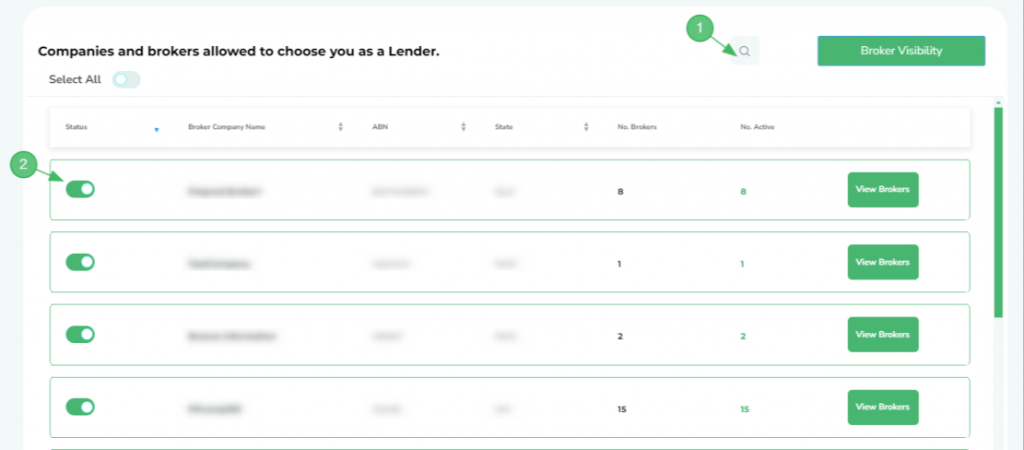
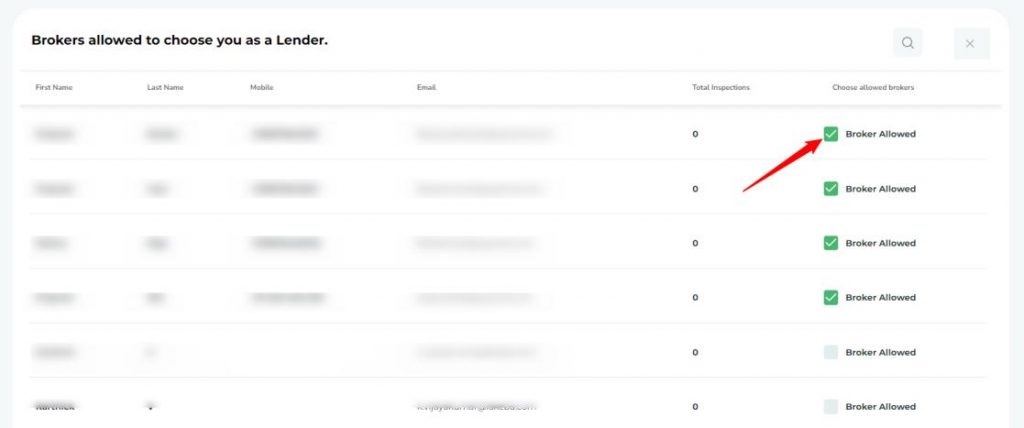
If you want to Block a specific Broker within a Broker company, click on “View Brokers” button against that company.

- From the list of broker users, uncheck the broker(s) you want to block.
How to allow internal users and brokers to upload specific inspection documents?
To enable this feature, Lender Admin needs go to Settings>>Company Details and scroll down to “Permissions”.
To enable your internal user,
- Select the option Admin Only OR All Users in – “Do you want your lender users to upload documents?“.
- Select the documents you want to allow the users to upload.
- Click “Save“
To enable the upload option for Brokers,
- Select the option “Yes” in- “Do you want your brokers to upload documents?“.
- Select the documents you want to allow the Brokers to upload via “Map Upload Documents“. You can also toggle on the “Select All” button to allow all the listed documents and click the “Save” button.
- Next, click “Map Brokers” button and select the Broker companies you want to allow to upload the documents. You can also toggle on the “Select All” button to allow all the listed companies and click the “Save” button.
- Now, all the selected broker companies will have ability to upload the selected documents for the inspections on behalf of the Seller.
After activation, you will see upload button against the documents for started inspection-

- If the inspection is not yet Started by the Seller, you will need to first Start the inspection and then you will be able to access the upload button against the documents. Follow the instructions in Inspection Progress section to Start the inspection

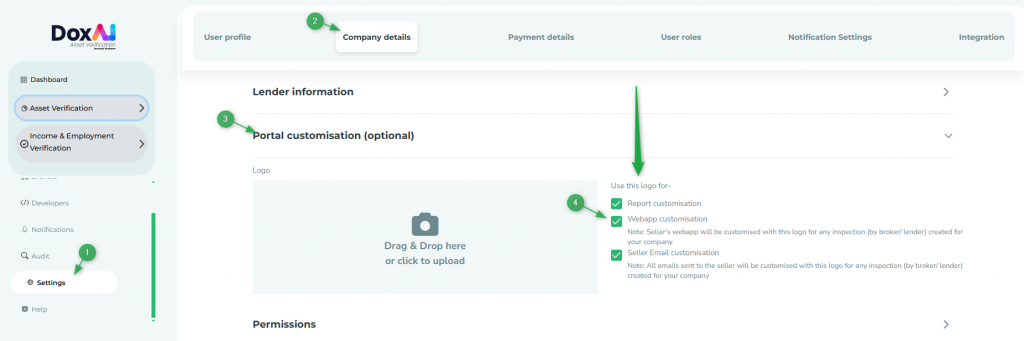
How to customise the web app and seller emails with your company logo?
To configure these, log in to your account, go to “Settings” from the left menu and click “Company details“. Expand the “Portal customisation (optional)” section and select your preference.
How to make buyer details mandatory for the inspections?
To make Buyer details mandatory for your inspections, navigate to Company Settings, scroll down to “Permissions”, and toggle on the option for “Do you want to make Buyer First Name and Last name as mandatory?”,

How to integrate B2B API
If you want to access our B2B APIs through the Developers tab, please contact us via support@doxai.co
How to enable 360° video (free or paid) for an asset in your inspection list?
If you want to enable 360° video (free or paid) for an asset in your inspection list, please contact us via Support@doxai.co.
How do I update my payment details?
There are two payment methods available- Pay as you go via credit card & Pay monthly by invoice.
Pay as you go via Credit card– Inspections created from Lender portal by you will be charged by credit card. If a broker creates an inspection under you, broker will be charged from their credit card.
- Go to “Settings”
- Click on “Payment details”.
- Add a valid card detail and click “Save & Update”
Pay monthly by invoice- To pay monthly by invoice please contact Support@doxai.co. You will need to have a signed contract with DoxAI Asset Verification to receive monthly invoice.
What are Admin Users Responsibility?
If You are a lender with administrator rights, you have the full responsibility for:
- Properly maintaining the list of users added under your company, including a regular review to ensure it remains appropriate and that all users who no longer require access to Asset Verification are removed.
- Assigning and maintaining appropriate user access/roles/permissions, appropriately limiting those with administrator- level of access to ensure appropriate security practices are used to prevent unauthorized access to Asset Verification by anyone other than authorized personnel;
- Ensuring the security settings of DoxAI comply with your specific security policy requirements.
- Monitoring overall portal activities via Audit tab
- Ensuring the supervision, management, and control of the use of DoxAI by your personnel and other authorised users;
- Notifying us of changes made to your technical or administrative contact details;
- Maintaining the security of data associated with integrations and API’s connected to Asset Verification.
- Reporting any security-related concerns or incidents to our security team in a timely manner by emailing support@doxai.co with a full and accurate description of the concerns or incidents.
If you are a lender with Billing responsibility-
- Add/ remove payment multiple payment methods (credit cards)
- Select primary payment methods
- Monitoring transactions
How do Lender Admin monitor portal activities?
Lender Admin can monitor portal activities via “Audit” tab.
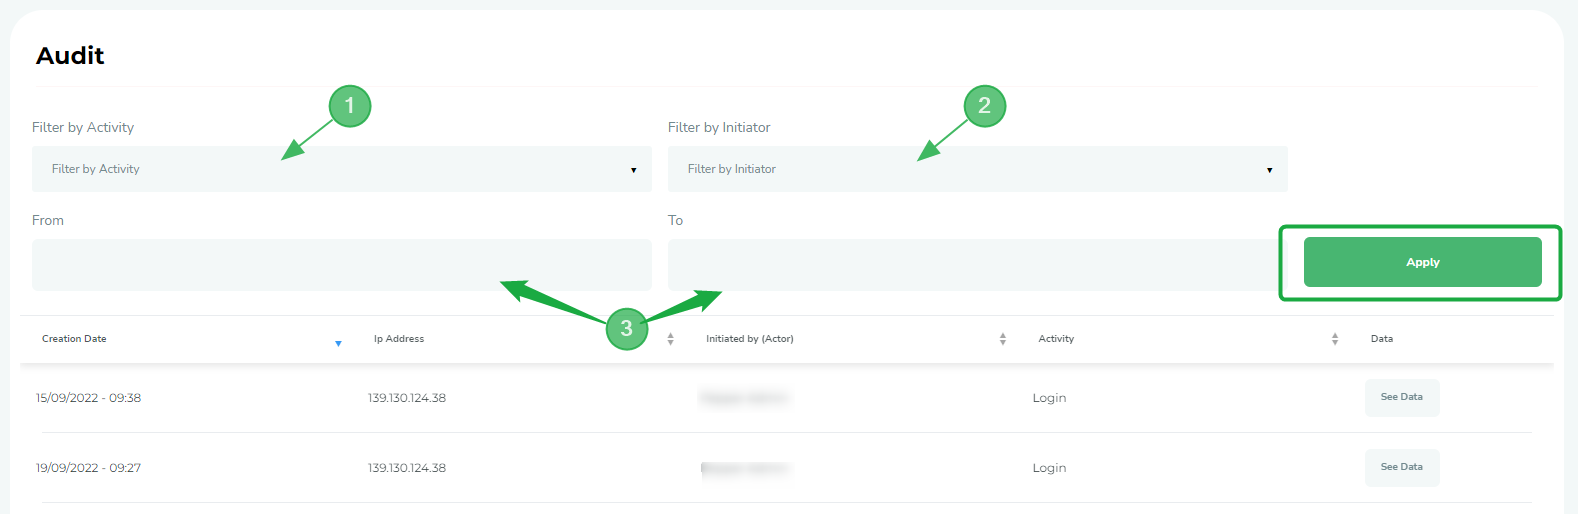
- To check the Activity log of all users, select the Activity type from the “Filter by Activity” dropdown list and click “Apply”.
- To check the Activity log of any specific user, select the user from the “Filter by Initiator” dropdown list and click “Apply”.
- To check the Activity log of a certain date range, select the date range and click “Apply”.
How do I add my company as a lender under DoxAI Asset Verification?
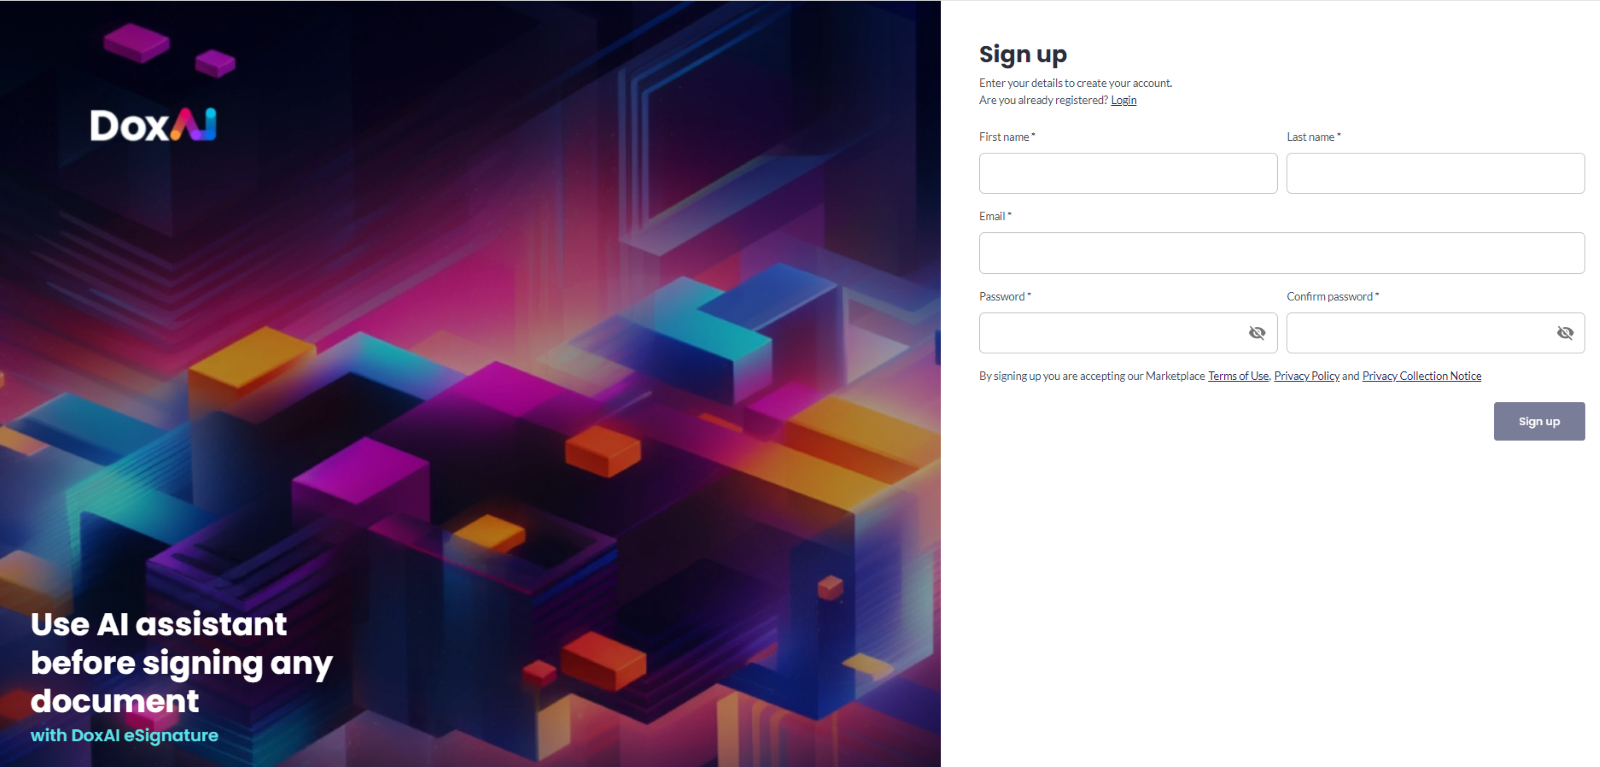
Go to our sign-up page- https://accounts.doxai.co/sign-up and sign up with your First name, Last name, Email address and password-
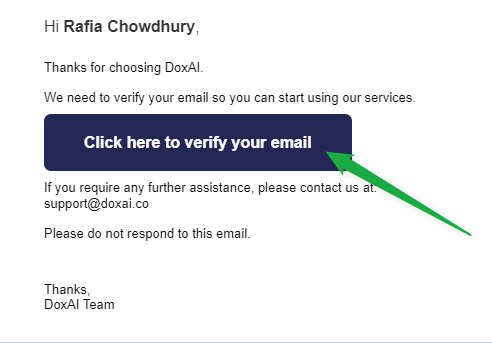
You will receive below email to verify your email address. Verify your email address and activate your account.
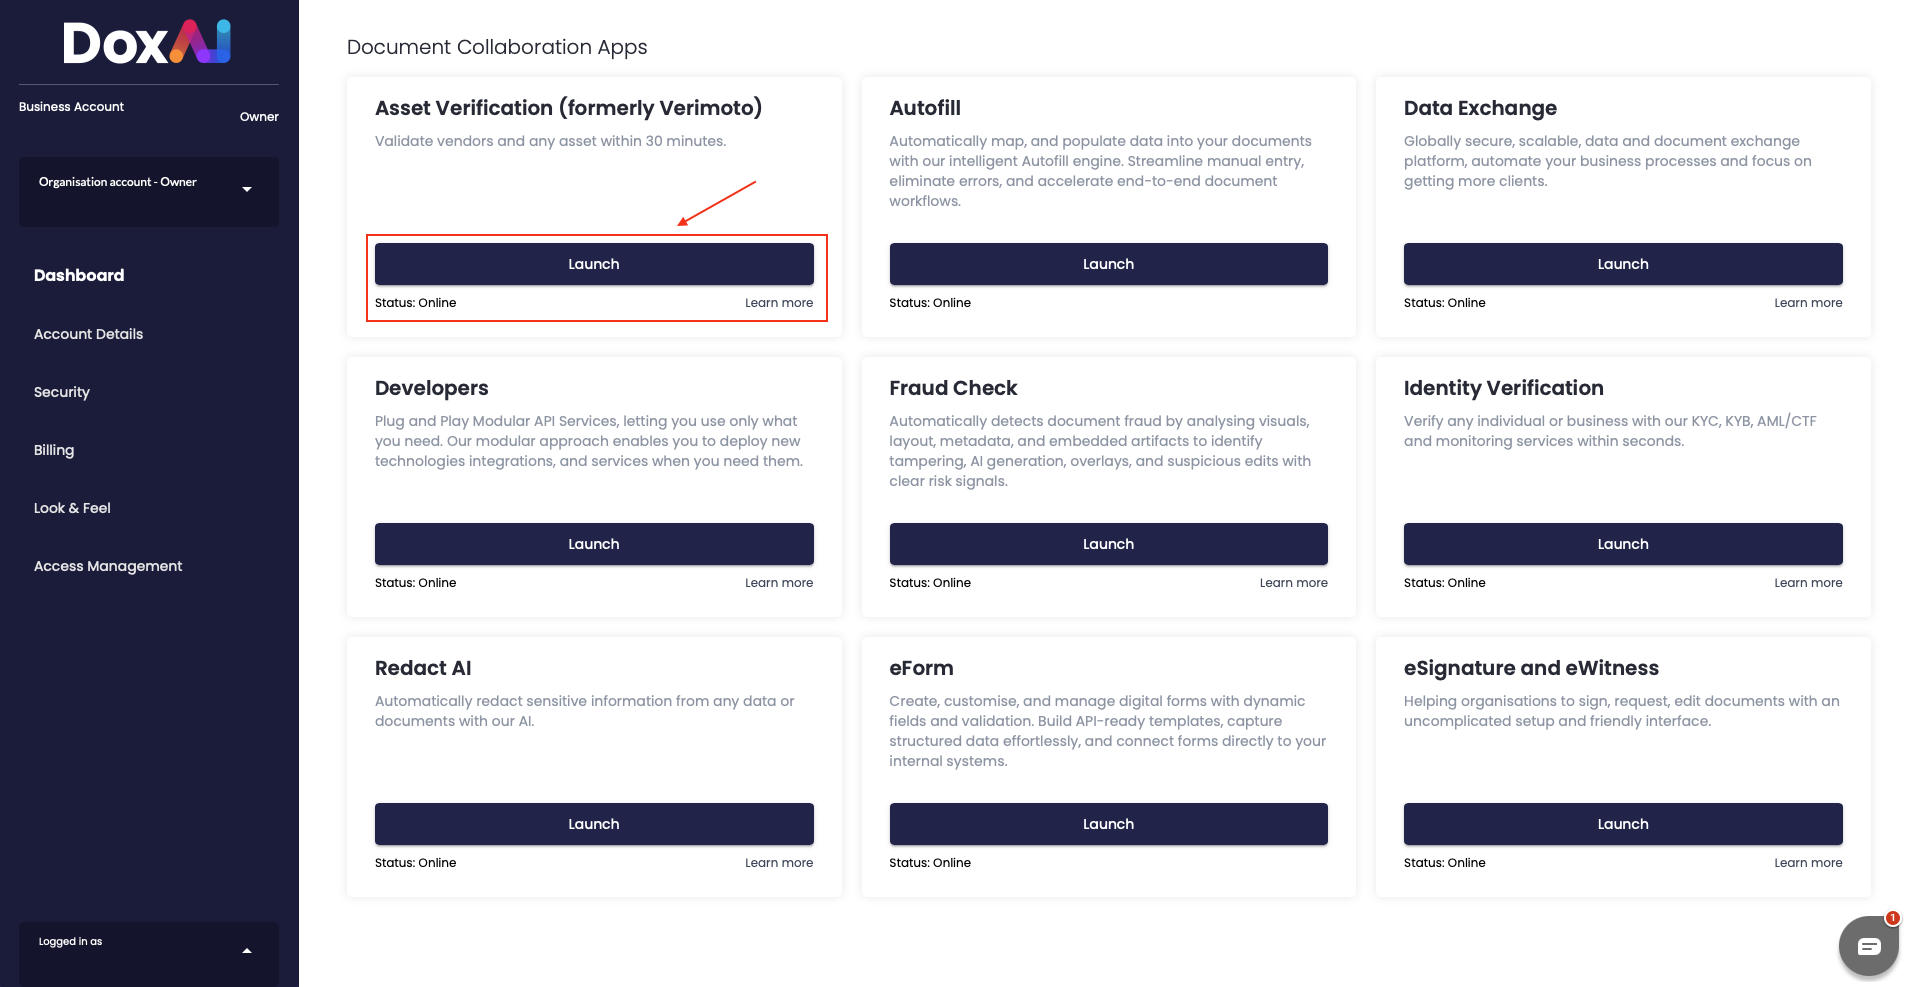
After email verification, login into your account and launch “Asset Verification” from “Dashboard”-
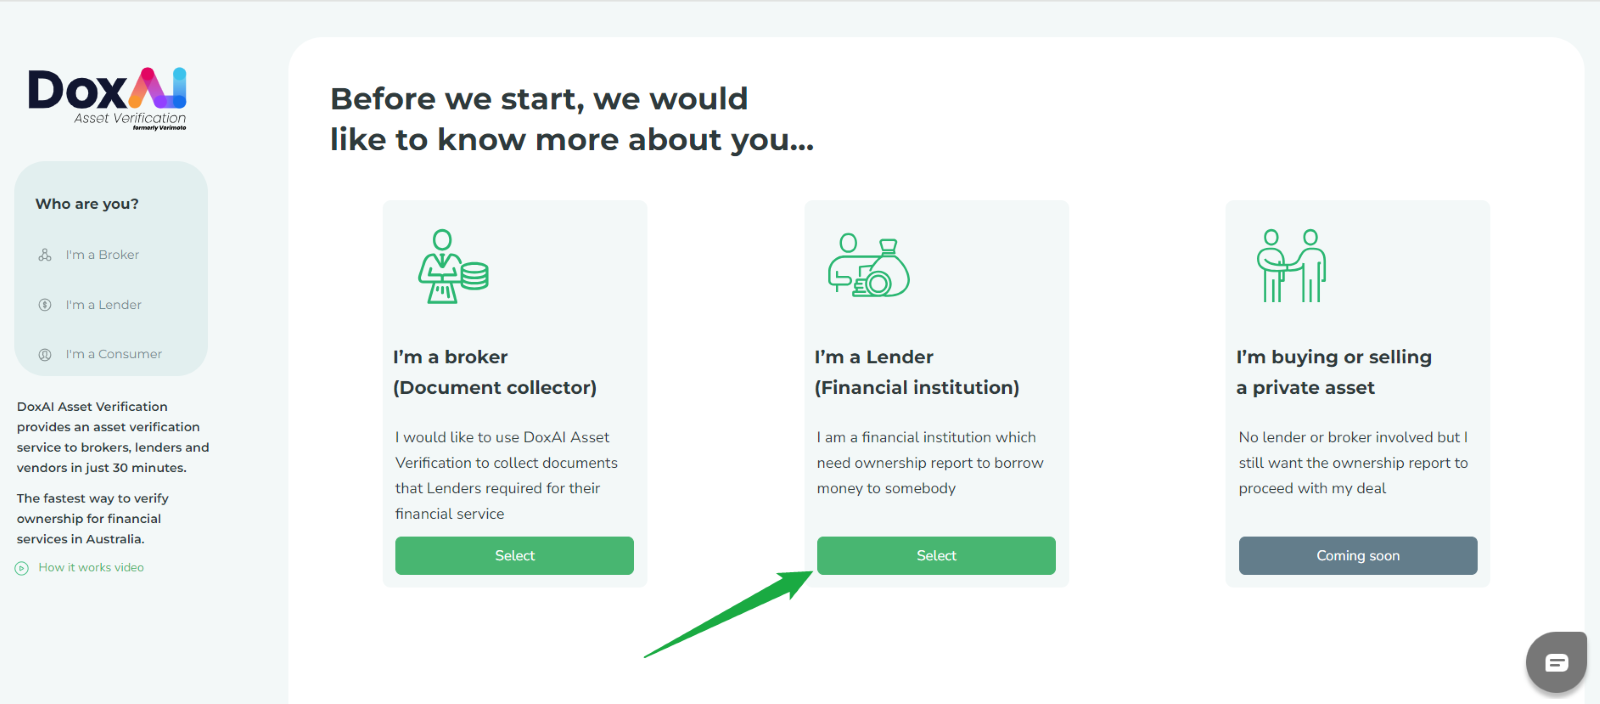
Provide company and personal details-
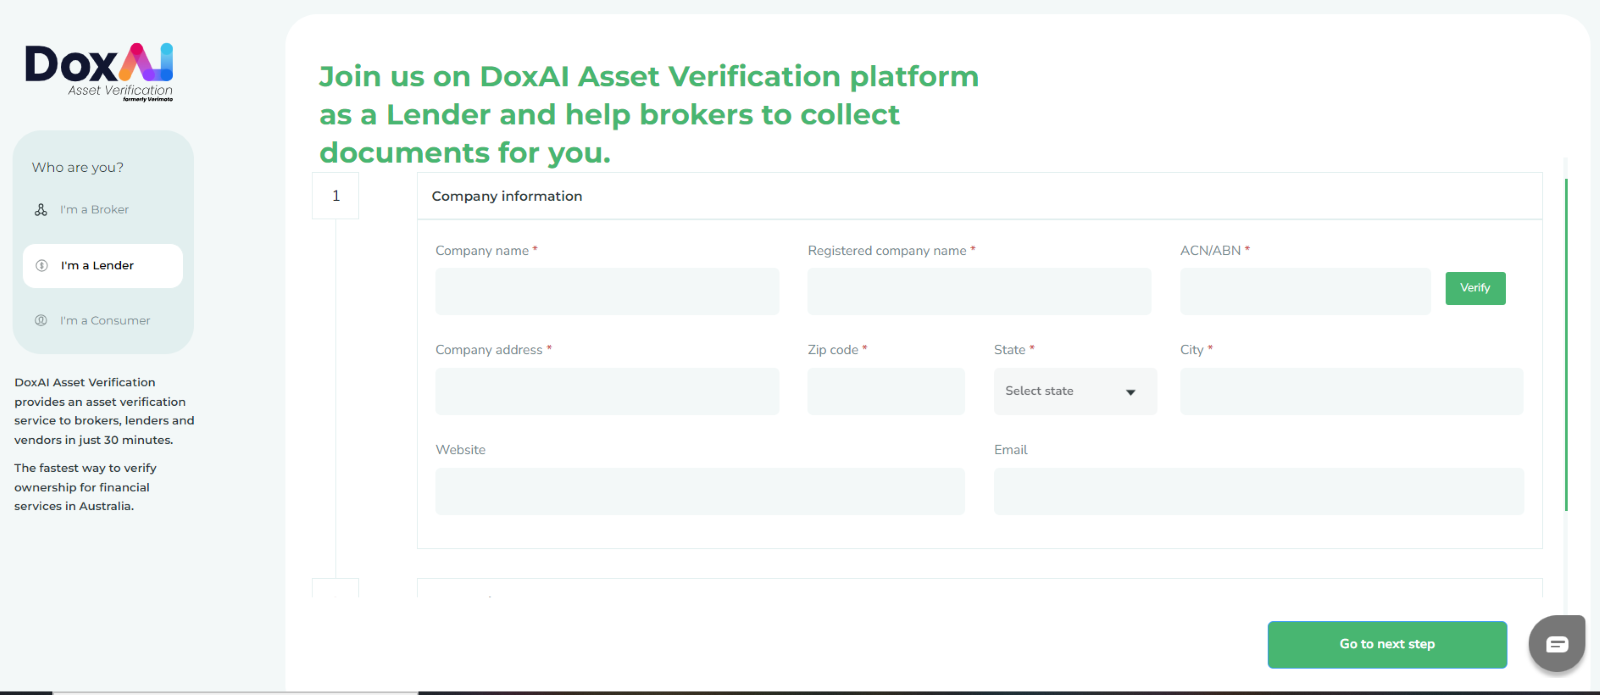
Write your message in the text box and “Register and get started”. Once the form is submitted, our team will get in touch with you within 3 business days.